目录
本文在YOLO-V3的基础上实现了把官方的coco数据集换成自己(的人、口罩二分类)的目标检测任务。训练自己的数据,并完成预测。
1.用labelme为数据打标签
- 需提前pip install labelme;pyqt5; pillow。然后在Anaconda prompt中输入labelme进入标记数据页面,如下图:
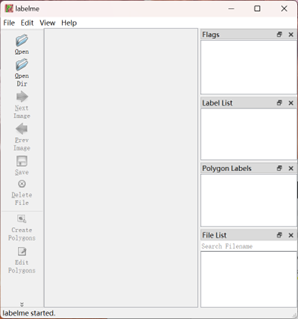
- 导入图片文件夹,右键选择矩形标注(注意标注时从左上角到右下角)点击上图的create polygons标注我们的数据,标注完成后并保存会生成.json文件,如下图:
2.写好模型所需的配置文件


(1)设置自己的分类数
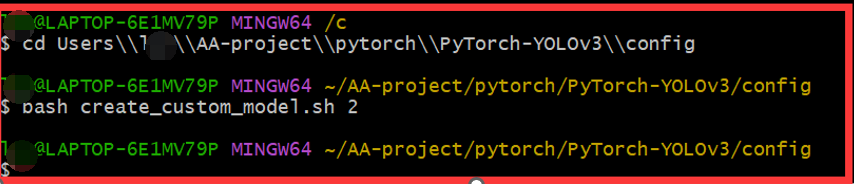
- 需要在create_custom_model.sh文件中把原来coco数据集的80分类改为现在的2分类,首先下载git(https://git-scm.com/ ),右键出现Git Bash Here,点击进入,输入bash create_custom_model.sh 2 (后面的数字表示你的任务的类别个数)如下图:
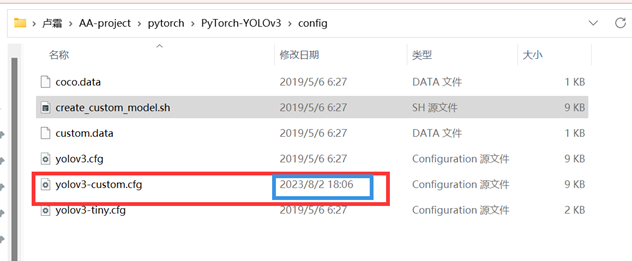
(2)自动生成配置文件yolov3-custom.cfg
- 与yolov3比网络架构同,参数不同,如yolo层的分类为2
3.标签格式转换
- labelme 的标签格式为x1,y1,x2,y2 需转换成 YOLO-V3的标签格式:Cx,Cy,W,H 相对位置(取值范围0-1)
- json2yolo.py 用它来把标签转换成对的格式,代码如下:
import json
import os
#由x1,y1,x2,y2  ---->Cx,Cy,W,H 相对位置(取值范围0-1)
name2id = {'person':0,'mask':1}#写好自己的类别和标签

def convert(img_size, box):
    dw = 1./(img_size[0])#压缩到0-1之间
    dh = 1./(img_size[1])
    x = (box[0] + box[2])/2.0 - 1
    y = (box[1] + box[3])/2.0 - 1
    w = box[2] - box[0]
    h = box[3] - box[1]
    x = x*dw
    w = w*dw
    y = y*dh
    h = h*dh
    return (x,y,w,h)#返回中心点和WH

def decode_json(json_floder_path,json_name):
    #转换好的标签路径(转换好的放哪)
    txt_name = 'C:\\Users\\***\\AA-project\\pytorch\\PyTorch-YOLOv3\\data\\custom\\labels\\' + json_name[0:-5] + '.txt'
    txt_file = open(txt_name, 'w')

    json_path = os.path.join(json_floder_path, json_name)
    data = json.load(open(json_path, 'r', encoding='gb2312'))

    img_w = data['imageWidth']
    img_h = data['imageHeight']

    for i in data['shapes']:#标注文件中的

        label_name = i['label']#标注名称
        if (i['shape_type'] == 'rectangle'):#矩形

            x1 = int(i['points'][0][0])#拿到坐标
            y1 = int(i['points'][0][1])
            x2 = int(i['points'][1][0])
            y2 = int(i['points'][1][1])

            bb = (x1,y1,x2,y2)#组成框
            bbox = convert((img_w,img_h),bb)#转换
            txt_file.write(str(name2id[label_name]) + " " + " ".join([str(a) for a in bbox]) + '\n')

if __name__ == "__main__":
    #读入json路径
    json_floder_path = 'C:\\Users\\***\\AA-project\\pytorch\\PyTorch-YOLOv3\\data\\custom\\label-test'
    json_names = os.listdir(json_floder_path)
    for json_name in json_names:
        decode_json(json_floder_path,json_name)
4.写好数据和标签的路径(json2yolo.py中)
- 转换好的输出路径:data\custom\labels(代码23行)
json_floder_path:labelme生成标签的文件夹(代码48行)
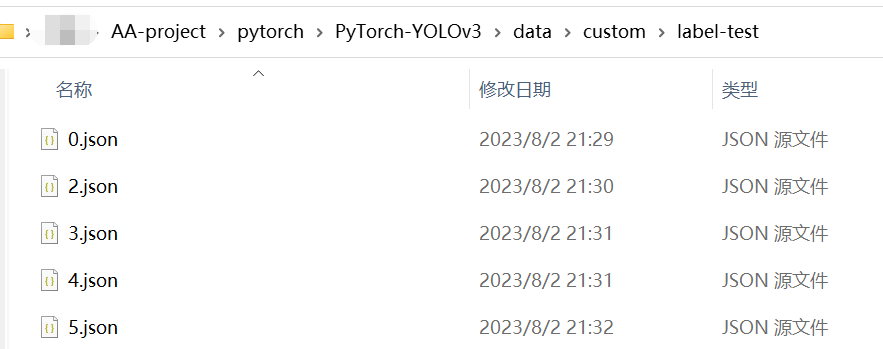
执行json2yolo.py在对应路径得到转换后的数据,打开如下所示:(最开始的0、1表示类别所对应的索引)

5.完成其他配置操作
(1)数据放到相应位置,注意名字和label的得一致

(2)更改类别名字
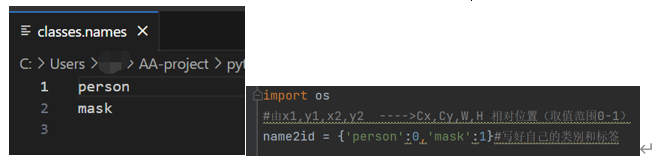
- 在data\custom\classes.names 改成你任务里有的类别名字
按字典定义的顺序写好,多加一行空白,便于读取
(3)设置train.txt和val.txt

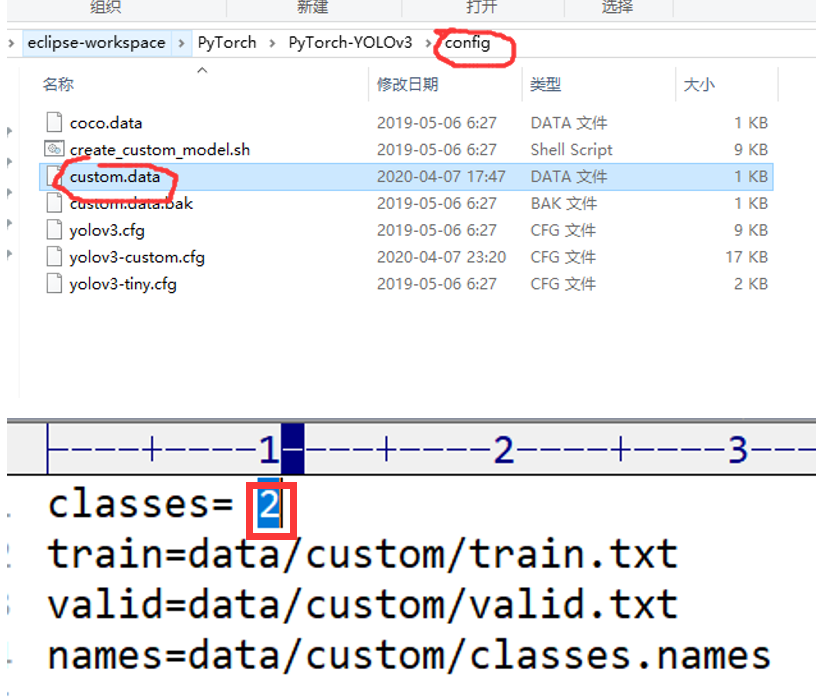
(4)设置custom.data
- 在custom.data中按如下设置,其中classes为类别数。
6.训练代码更改
- train.py需要设置的参数
--model_def config/yolov3-custom.cfg
--data_config config/custom.data
--pretrained_weights weights/darknet53.conv.74 #看你想不想在人家基础上去做 - 训练完后在checkpoints中生成如下模型文件,用最后一个训练好的模型来做测试

7.预测
- 在detect.py中指定参数,
--image_folder data/samples/ #把需要预测的数据放到这里
--checkpoint_model checkpoints/yolov3_ckpt_100.pth #训练好模型的路径
--class_path data/custom/classes.names #画图时候要把框上显示出来name - 最后预测结果保存在output中,结果如下:
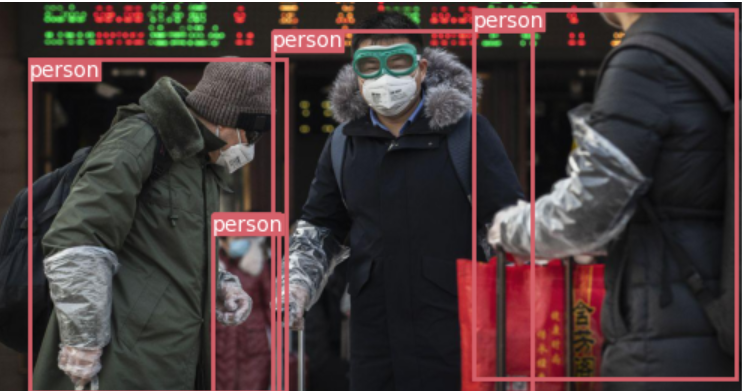
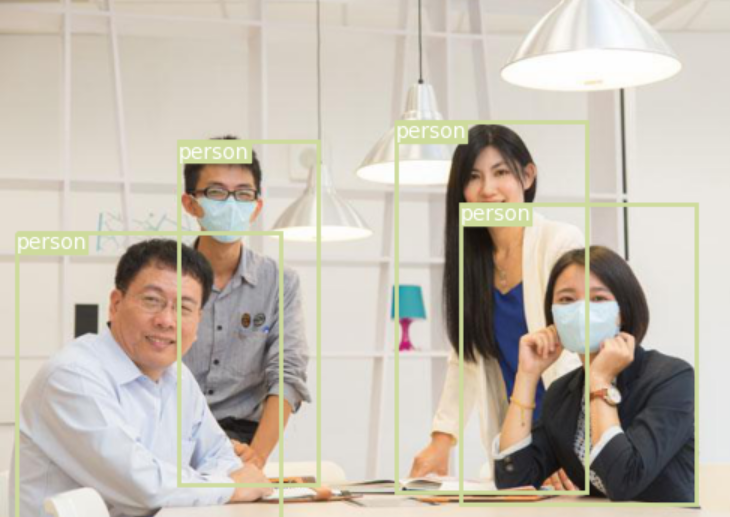
- 由于训练数据只有6张加上口罩较小,所以最后的预测效果不太理想,只检测到人,期待一下后续的yolo版本把任务做的更好...
额外注意:create_custom_model.sh不能重复执行,要先把yolov3-custom.cfg删除掉才可以