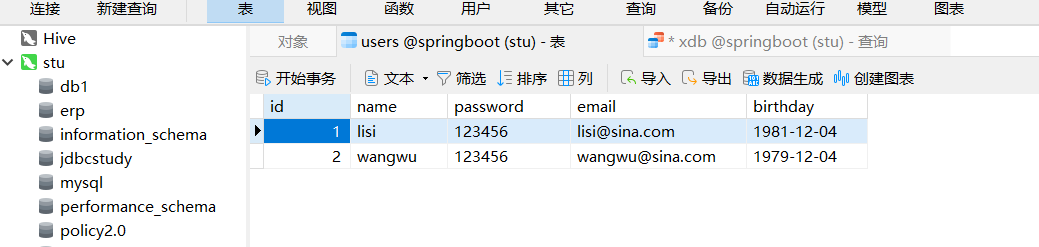
导入数据库文件
CREATE DATABASE `springboot` /*!40100 DEFAULT CHARACTER SET utf8mb4 COLLATE utf8mb4_0900_ai_ci */ /*!80016 DEFAULT ENCRYPTION='N' */
CREATE TABLE `users` (
  `id` int unsigned NOT NULL AUTO_INCREMENT,
  `name` varchar(40) CHARACTER SET utf8mb3 COLLATE utf8mb3_general_ci DEFAULT NULL,
  `password` varchar(40) CHARACTER SET utf8mb3 COLLATE utf8mb3_general_ci DEFAULT NULL,
  `email` varchar(60) DEFAULT NULL,
  `birthday` date DEFAULT NULL,
  PRIMARY KEY (`id`)
) ENGINE=InnoDB AUTO_INCREMENT=4 DEFAULT CHARSET=utf8mb3
后端
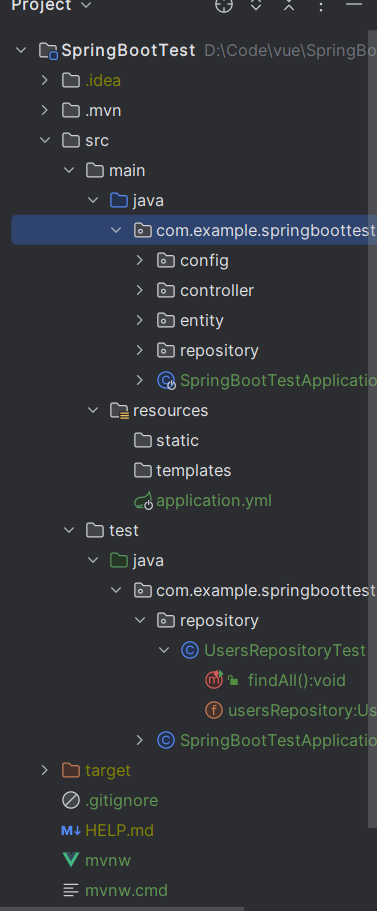
创建SpringBoot项目
第一步,导入pom.xml依赖
<dependencies>
        <dependency>
            <groupId>org.springframework.boot</groupId>
            <artifactId>spring-boot-starter-data-jpa</artifactId>
        </dependency>
        <dependency>
            <groupId>org.springframework.boot</groupId>
            <artifactId>spring-boot-starter-web</artifactId>
        </dependency>

        <dependency>
            <groupId>com.mysql</groupId>
            <artifactId>mysql-connector-j</artifactId>
            <scope>runtime</scope>
        </dependency>
        <dependency>
            <groupId>org.projectlombok</groupId>
            <artifactId>lombok</artifactId>
            <optional>true</optional>
        </dependency>
        <dependency>
            <groupId>org.springframework.boot</groupId>
            <artifactId>spring-boot-starter-test</artifactId>
            <scope>test</scope>
        </dependency>
    </dependencies>

    <build>
        <plugins>
            <plugin>
                <groupId>org.springframework.boot</groupId>
                <artifactId>spring-boot-maven-plugin</artifactId>
                <configuration>
                    <image>
                        <builder>paketobuildpacks/builder-jammy-base:latest</builder>
                    </image>
                    <excludes>
                        <exclude>
                            <groupId>org.projectlombok</groupId>
                            <artifactId>lombok</artifactId>
                        </exclude>
                    </excludes>
                </configuration>
            </plugin>
        </plugins>
    </build>
第二步,编译application.yml文件,连接数据库
spring:
  datasource:
    url : jdbc:mysql://localhost:3306/springboot?useUnicode=true&characterEncoding=utf8&serverTimezone=GMT%2B8
    username : root
    password : 123456
    driver-class-name : com.mysql.cj.jdbc.Driver
  jpa: #自动生成函数所带的说起来语句
    show-sql: true
    properties:
      hibernate:
        format_sql: true
server:
  port: 8181
ps.确定端口号为8181,不能是8080,这样会与前端冲突
第三步,撰写JavaBean
Users.java
package com.example.springboottest.entity;

import jakarta.persistence.Entity;
import jakarta.persistence.Id;
import lombok.Data;

@Entity
@Data
public class Users {
    @Id
    private Integer id;
    private String name;
    private String password;
    private String email;
    private String birthday;

}
第四步,写一下储存库UsersRepository接口
UsersRepository.java
package com.example.springboottest.repository;


import com.example.springboottest.entity.Users;
import org.springframework.data.jpa.repository.JpaRepository;

public interface UsersRepository extends JpaRepository<Users, Integer> {


}
第五步,写一下连接层,与网络连接
UserHandler.java
package com.example.springboottest.controller;


import com.example.springboottest.entity.Users;
import com.example.springboottest.repository.UsersRepository;
import org.springframework.beans.factory.annotation.Autowired;
import org.springframework.web.bind.annotation.GetMapping;
import org.springframework.web.bind.annotation.RequestMapping;
import org.springframework.web.bind.annotation.RestController;

import java.util.List;

@RestController
@RequestMapping("/user")
public class UserHandler {

    @Autowired
    private UsersRepository usersRepository;

    @GetMapping("/findAll")
    public List<Users> findAll() {
        return usersRepository.findAll();
    }

}
第六步,CrosConfig.java
由于前后端端口不一,需要端口配置文件,将后端的URL可以传给前端使用,需要这个文件
package com.example.springboottest.config;

import org.springframework.context.annotation.Configuration;
import org.springframework.web.servlet.config.annotation.CorsRegistry;
import org.springframework.web.servlet.config.annotation.WebMvcConfigurer;

@Configuration
public class CrosConfig implements WebMvcConfigurer {

    @Override
    public void addCorsMappings(CorsRegistry registry) {
        registry.addMapping("/**")
               .allowedOrigins("*")
               .allowedMethods("GET", "POST", "PUT", "DELETE")
               .allowedHeaders("*")
               .allowCredentials(false)
               .maxAge(3600);
    }
}
第七步,运行
运行SpringBootTestApplication.java文件,则localhost:8181端口启动
前端
创建一个有vuex,router路由的vue2.0前端项目
第一步,终端导入axios
输入:vue add axios
ps.这个命令,我只在idea输入成功,vscode不知道为什么输入无效
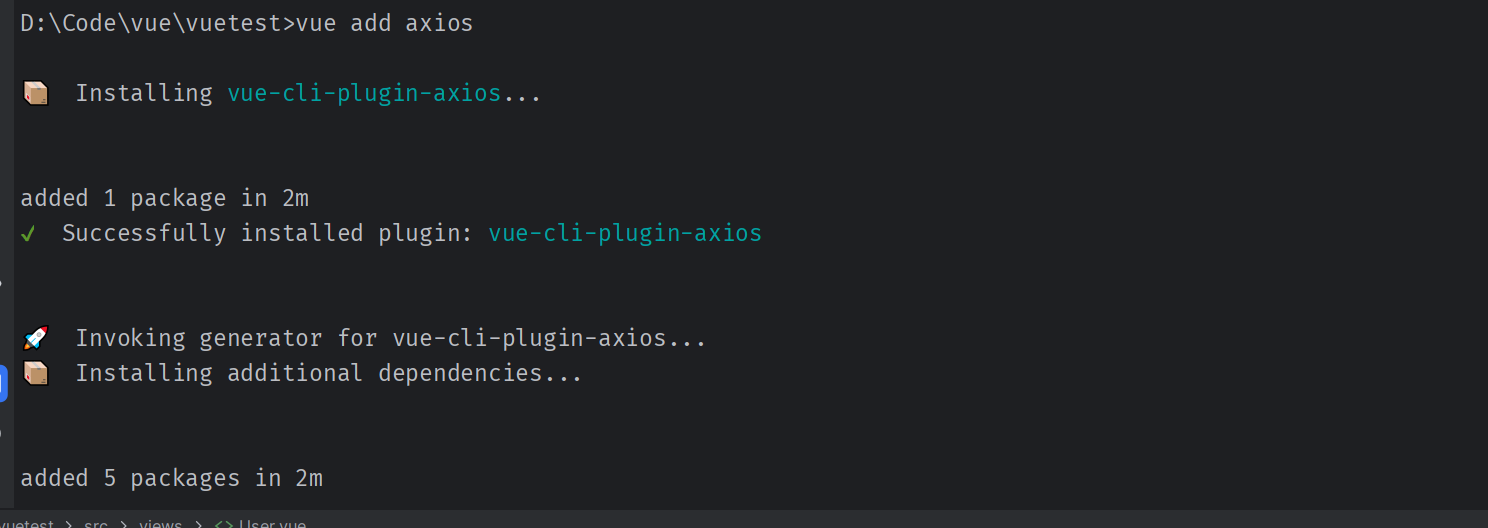
src的文件出现了plugins文件夹就是成功标志

第二步,在views界面创建User.vue前端vue界面

<template>
  <div>
    <table>
      <tr>
          <td>ID</td>
          <td>name</td>
          <td>password</td>
          <td>email</td>
          <td>birthday</td>
      </tr>
      <tr v-for="item in User">
        <td>{{ item.id }}</td>
        <td>{{item.name}}</td>
        <td>{{item.password}}</td>
        <td>{{item.email}}</td>
        <td>{{item.birthday}}</td>
      </tr>
    </table>
  </div>
</template>

<script>
export default {
      name: "User",
      data() {
        return {
            msg: "Hello User",
          User: [
            {
              id: 1,
              name: "name",
              password: "password",
              email: "email",
              birthday: "birthday"
            }]
        }
    },
    created() {
          const _this=this;
          axios.get('http://localhost:8181/user/findAll').then(function (resp){
              _this.User = resp.data;
          })
        }
} <!--写上ajax代码,用于查询所有数据-->
</script>

<style>

</style>
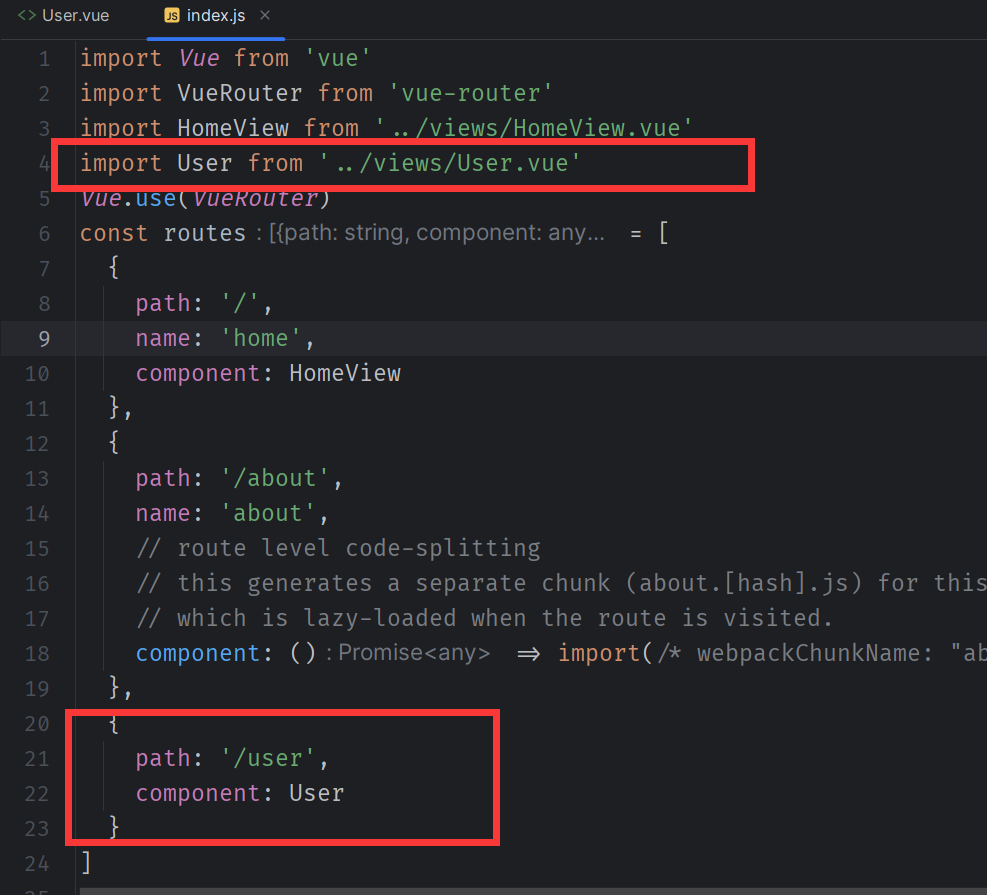
第三步,导入刚刚写的文件路由
在router路由文件导入User.vue路由

import User from '../views/User.vue'
  {
    path: '/user',
    component: User
  }
这样就能在前端查看User.vue了
第四步,前端终端输入npm run serve 启动项目,localhost:8080启动
结果测试

测试成功