利用PaddleHub 进行人脸检测识别、并对图片进行抠图
本文是利用百度的飞桨平台的paddle进行人脸的检测和抠图,但是里面也有一些小问题,特记录一下笔记,以便以后观看学习。
环境:python3.9 飞桨是2.5.2(截稿期是最新版)
工具:PyCharm
代码如下:
# This is a sample Python script.
# Press Alt+Shift+X to execute it or replace it with your code.
# Press Double Shift to search everywhere for classes, files, tool windows, actions, and settings.
import paddlehub as hub
import matplotlib.pyplot as plt
import matplotlib.image as mpimg
import numpy as np
test_img_path = ["C:/Users/Administrator/Desktop/qaws/6325110.png"]
input_dict = {"image": test_img_path}
'''
人脸检测
'''
def identfyPer():
#调用PaddleHub中的人脸检测模型
moduleOne = hub.Module(name="ultra_light_fast_generic_face_detector_1mb_640")
imgOne = mpimg.imread(test_img_path[0])
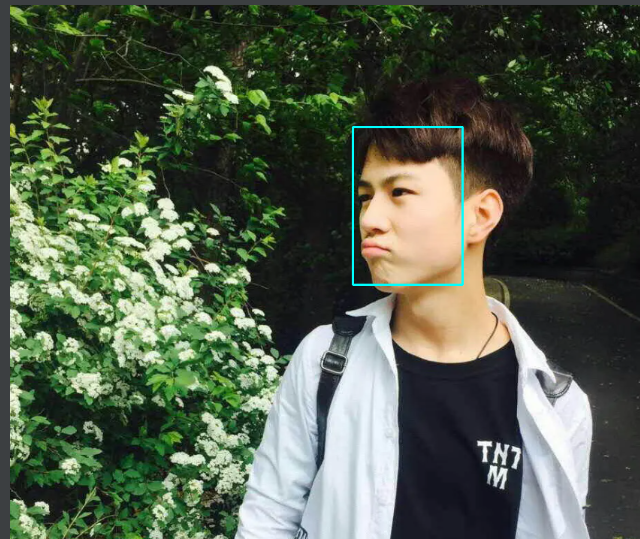
# 人脸检测,到这一步人脸检测就已经完成了,并且python会自动在项目根目录给你建一个文件,并显示图片
resultOnes = moduleOne.face_detection(data=input_dict, visualization=True)
# for rs in resultOnes:
# pne = rs["data"]
# print(rs)
检测到人脸如下
'''
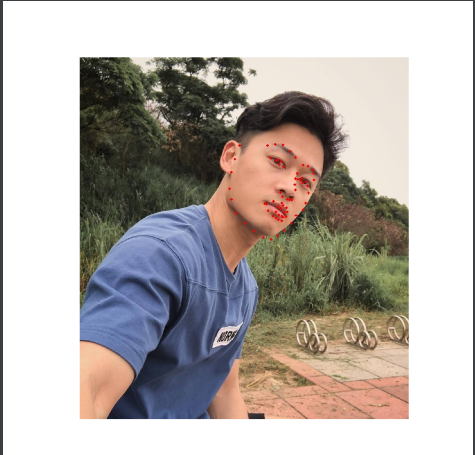
人脸关键点检测
'''
def keypointJce():
src_img = cv2.imread(test_img_path[1])
module = hub.Module(name="face_landmark_localization")
result = module.keypoint_detection(images=[src_img])
tmp_img = src_img.copy()
for index, point in enumerate(result[0]['data'][0]):
cv2.circle(tmp_img, (int(point[0]), int(point[1])), 2, (0, 0, 255), -1)
res_img_path = 'face_1.jpg'
cv2.imwrite(res_img_path, tmp_img)
img = mpimg.imread(res_img_path)
# 展示预测关键点结果
plt.figure(figsize=(10, 10))
plt.imshow(img)
plt.axis('off')
plt.show()
'''
   人像抠图,paddlehub有个缺点只能识别正脸的,侧脸的是不能完成抠图的
'''
def coPic():
    # 人像抠图模型
    module = hub.Module(name="deeplabv3p_xception65_humanseg")
    results = module.segmentation(data=input_dict)
    img = mpimg.imread(test_img_path[0])
    for result in results:
        prediction = result["data"]
        # 运用线性代数实现:使用抠图数据剪切原图
        newimg = np.zeros(img.shape)
        newimg[:, :, 0] = img[:, :, 0] * (prediction > 0)
        newimg[:, :, 1] = img[:, :, 1] * (prediction > 0)
        newimg[:, :, 2] = img[:, :, 2] * (prediction > 0)
        newimg = newimg.astype(np.uint8)

        # 抠图结果展示
        plt.figure(figsize=(10, 10))
        plt.imshow(newimg)
        plt.axis('off')
        plt.show()

原圖:

AI抠图后:

抠图:貌似值不支持png格式图片。有点限制。
# Press the green button in the gutter to run the script.
if __name__ == '__main__':
    coPic()

# See PyCharm help at https://www.jetbrains.com/help/pycharm/