参考地址:https://opencv-python-tutorials.readthedocs.io/zh/latest/
安装
pip install opencv-python
以下所有内容来自上边连接中整理,使用中参考上边连接中的文档
图片
import cv2 as cv
from matplotlib import pyplot as plt

def image():
    # 以灰度方式打开图片
    img = cv.imread('C:\\Users\\yuyalong\\Pictures\\Camera Roll\\15.jpg', 0)
    print(img)

    # 用pyplot显示
    plt.imshow(img, cmap='gray', interpolation='bicubic')
    plt.xticks([]), plt.yticks([])  # to hide tick values on X and Y axis
    plt.show()

    # 用opencv显示
    cv.imshow('image', img)
    k = cv.waitKey(0)
    if k == 27:  # wait for ESC key to exit
        cv.destroyAllWindows()
    elif k == ord('s'):  # wait for 's' key to save and exit
        cv.imwrite('messigray.png', img)
        cv.destroyAllWindows()

    # 保存图片
    cv.imwrite('my.png', img)
pyplot显示
opencv显示
视频
用摄像头捕获视频
import cv2 as cv

def video():
    cap = cv.VideoCapture(0)
    # Define the codec and create VideoWriter object
    fourcc = cv.VideoWriter_fourcc(*'XVID')
    out = cv.VideoWriter('output.avi', fourcc, 20.0, (640, 480))
    while cap.isOpened():
        ret, frame = cap.read()

        if not ret:
            print('摄像头捕获图像失败')
            break

        gray = cv.cvtColor(frame, cv.COLOR_BGR2GRAY)
        # 显示
        cv.imshow('frame', gray)
        # 保存
        out.write(frame)
        if cv.waitKey(1) & 0xFF == ord('q'):
            break

    # When everything done, release the capture
    cap.release()
    out.release()
    cv.destroyAllWindows()
读取视频文件
def read_video():
    cap = cv.VideoCapture('output.avi')
    while cap.isOpened():
        res, frame = cap.read()
        if not res:
            print('读取视频失败')
            break
        gray = cv.cvtColor(frame, cv.COLOR_BGR2GRAY)
        cv.imshow('gray', gray)
        if cv.waitKey(25) & 0xFF == ord('q'):
            # cv.waitKey()参数 如果它太小,视频将非常快,如果它太高,视频将会很慢。在正常情况下,25毫秒就可以了
            break
    cap.release()
    cv.destroyAllWindows()
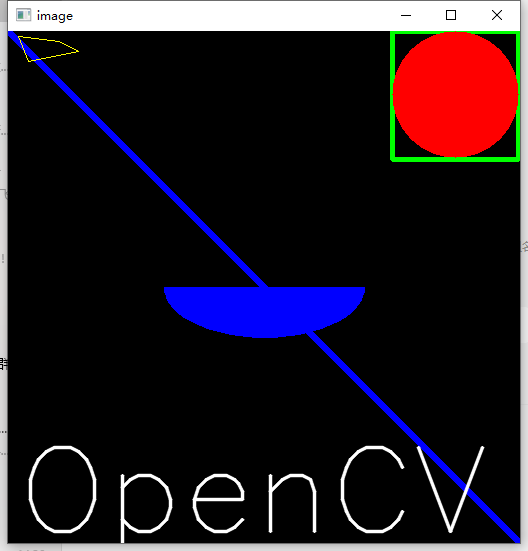
绘图功能
def draw_image():
    # Create a black image
    img = np.zeros((512, 512, 3), np.uint8)
    # Draw a diagonal blue line with thickness of 5 px
    # 直线 第一个参数是背景,第二个参数是线的起始点,第三个是终止点,第四个是线的颜色,第5个是线宽
    # cv.polylines()可用于绘制多条线。 只需创建要绘制的所有行的列表并将其传递给函数。 所有线条都将单独绘制。 绘制一组直线比每行调用cv.line()要好得多,速度更快。
    cv.line(img, (0, 0), (511, 511), (255, 0, 0), 5)

    # 矩形框
    cv.rectangle(img, (384, 0), (510, 128), (0, 255, 0), 3)

    # 圆
    cv.circle(img, (447, 63), 63, (0, 0, 255), -1)

    # 椭圆
    # 要绘制椭圆,我们需要传递几个参数,一个参数是椭圆中心位置(x,y),下一个是长轴长度和断轴长度(a,b),角度是椭圆在逆时针方向上的旋转角度,
    # startAngle和endAngle表示从主轴顺时针方向测量的椭圆弧的起点和终点,即给出值0和360给出完整的椭圆,给出值180则画出半个椭圆
    cv.ellipse(img, (256, 256), (100, 50), 0, 0, 180, 255, -1)

    # 多边形
    # 要绘制多边形,首先需要顶点坐标。 将这些点转换为ROWSx1x2的数组,其中ROWS是顶点数,它应该是int32类型。在这里,我们绘制一个带有四个黄色顶点的小多边形。
    # 注意:如果第三个参数为False,则绘制所有点的相连图形而不是闭合图形
    pts = np.array([[10, 5], [20, 30], [70, 20], [50, 10]], np.int32)
    pts = pts.reshape((-1, 1, 2))
    cv.polylines(img, [pts], True, (0, 255, 255))

    # 添加文字
    font = cv.FONT_HERSHEY_SIMPLEX
    cv.putText(img, 'OpenCV', (10, 500), font, 4, (255, 255, 255), 2, cv.LINE_AA)

    cv.imshow('image', img)
    if cv.waitKey(0) & 0xFF == ord('q'):
        cv.destroyAllWindows()
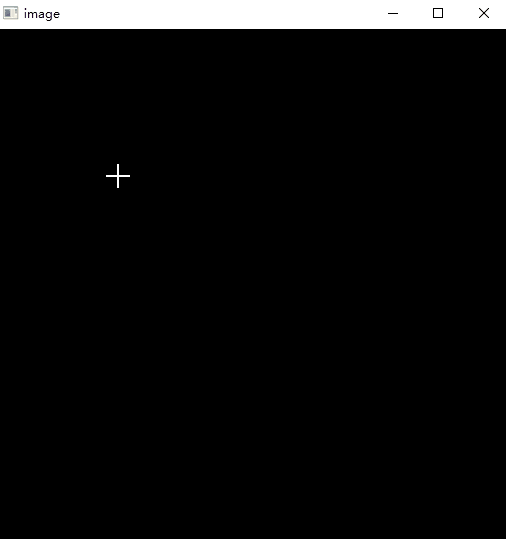
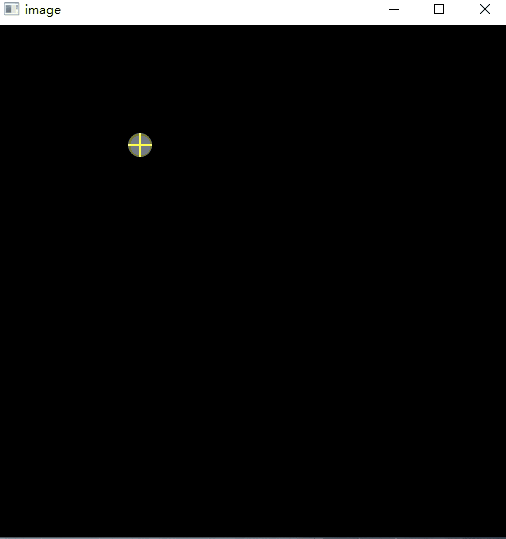
鼠标做画笔
查看所有支持的事件
events = [i for i in dir(cv) if 'EVENT' in i]
print(events)

--res
中文解释
cv.EVENT_MOUSEMOVE 0 鼠标移动事件
cv.EVENT_LBUTTONDOWN 1 鼠标左键按下事件
cv.EVENT_RBUTTONDOWN 2 鼠标右键按下事件
cv.EVENT_MBUTTONDOWN 3 鼠标中键按下事件
cv.EVENT_LBUTTONUP 4 鼠标左键释放事件
cv.EVENT_RBUTTONUP 5 鼠标右键释放事件
cv.EVENT_MBUTTONUP 6 鼠标中键释放事件
cv.EVENT_LBUTTONBLCLK 7 鼠标左键双击事件
cv.EVENT_RBUTTONBLCLK 8 鼠标右键双击事件
cv.EVENT_MBUTTONBLCLK 9 鼠标中键双击事件
cv.EVENT_MOUSEWHEEL 10 滑动滚轮上下滚动
cv.EVENT_MOUSEHWHEEL 11 滑动滚轮左右滚动
鼠标事件回调
def mouse_event():
    # mouse callback function
    def draw_circle(event, x, y, flags, param):
        # 左键双击画圆
        if event == cv.EVENT_LBUTTONDBLCLK:
            cv.circle(img, (x, y), 10, (255, 0, 0), -1)
        # 当左键按下并移动时绘制图形,event可以查看移动,flag查看是否按下
        elif event == cv.EVENT_MOUSEMOVE and flags == cv.EVENT_FLAG_LBUTTON:
            cv.circle(img, (x, y), 10, (255, 0, 0), -1)

    # Create a black image, a window and bind the function to window
    img = np.zeros((512, 512, 3), np.uint8)
    cv.namedWindow('image')

    # 鼠标事件回调
    cv.setMouseCallback('image', draw_circle)
    while True:
        cv.imshow('image', img)
        if cv.waitKey(20) & 0xFF == 27:  # esc
            break
    cv.destroyAllWindows()
双击画圆
按下左键移动画轨迹
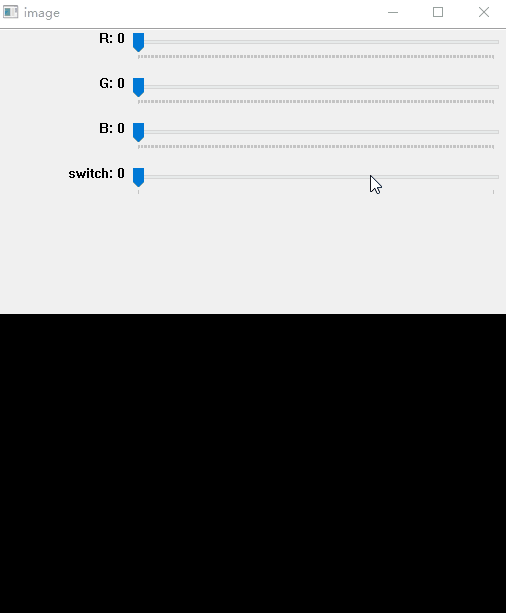
调色盘
def nothing(x):
    pass

# Create a black image, a window
img = np.zeros((300, 512, 3), np.uint8)
cv.namedWindow('image')

# create trackbars for color change
cv.createTrackbar('R', 'image', 0, 255, nothing)
cv.createTrackbar('G', 'image', 0, 255, nothing)
cv.createTrackbar('B', 'image', 0, 255, nothing)

# create switch for ON/OFF functionality
switch = 'switch'
cv.createTrackbar(switch, 'image', 0, 1, nothing)

while True:
    cv.imshow('image', img)
    k = cv.waitKey(1) & 0xFF
    if k == 27:
        break

    # get current positions of four trackbars
    r = cv.getTrackbarPos('R', 'image')
    g = cv.getTrackbarPos('G', 'image')
    b = cv.getTrackbarPos('B', 'image')
    s = cv.getTrackbarPos(switch, 'image')
    if s == 0:
        img[:] = 0
    else:
        img[:] = [b, g, r]

cv.destroyAllWindows()
- opencv-python opencv pythonopencv-python opencv-python opencv python opencv-python opencv python cv2 python opencv-python exception opencv opencv-python opencv python视频 opencv-python python_pip install python opencv-python pyproject building命令 opencv-python特征opencv python opencv-python图像opencv python opencv-python模板opencv python