Games101 HomeWork3
导航
作业要求
第三次作业才是真正上强度的作业,作业要求和质量都特别高,先来看看所有的要求:
- 1 . 修改函数rasterize_triangle(const Triangle& t) in rasterizer.cpp: 在此处实现与作业 2 类似的插值算法,实现法向量、颜色、纹理颜色的插值。
- 2 . 修改函数 get_projection_matrix() in main.cpp: 将你自己在之前的实验中实现的投影矩阵填到此处,此时你可以运行./Rasterizer output.png normal来观察法向量实现结果。
- 3 . 修改函数 phong_fragment_shader() in main.cpp: 实现 Blinn-Phong 模型计算 Fragment Color.
- 4 . 修改函数 texture_fragment_shader() in main.cpp: 在实现 Blinn-Phong的基础上,将纹理颜色视为公式中的 kd,实现 Texture Shading FragmentShader.
- 5 . 修改函数 bump_fragment_shader() in main.cpp: 在实现 Blinn-Phong 的基础上,仔细阅读该函数中的注释,实现 Bump mapping.
- 6 . 修改函数 displacement_fragment_shader() in main.cpp: 在实现 Bumpmapping 的基础上,实现 displacement mapping.
提高题 - 7 .尝试更多模型
- 8 .双线性纹理插值
不要慌张,一个一个来。先看第一题
rasterize_triangle中的插值
我们在第二题2x2的超采样的基础上进行,先看看题目的提示:
rasterize_triangle 函数与你在作业2 中实现的内容相似。不同之处在于被
设定的数值将不再是常数,而是按照 Barycentric Coordinates 对法向量、颜
色、纹理颜色与底纹颜色(Shading Colors) 进行插值。回忆我们上次为了计算
z value 而提供的[alpha, beta, gamma],这次你将需要将其应用在其他参
数的插值上。你需要做的是计算插值后的颜色,并将Fragment Shader 计算得
到的颜色写入 framebuffer,这要求你首先使用插值得到的结果设置 fragment
shader payload,并调用 fragment shader 得到计算结果。
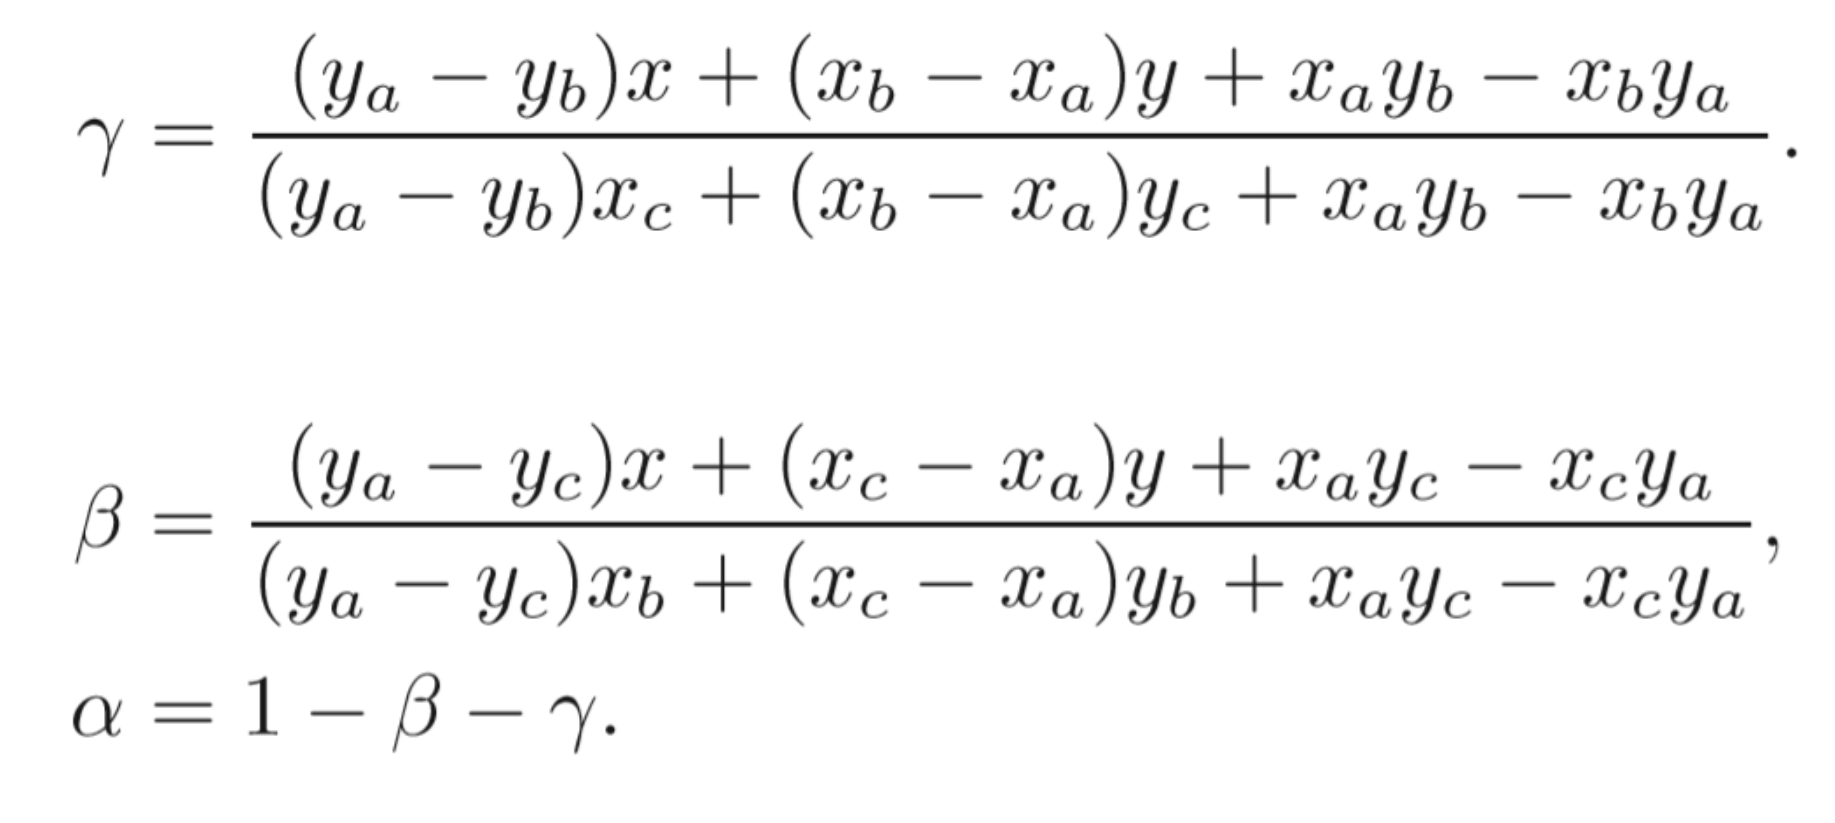
可以看见,这里基本给出了插值的操作步骤,这里对一个重心坐标做一个解释:
重心坐标(Barycentric Coordinates)
给定三角形的三点坐标A, B, C,该平面内一点(x,y)可以写成这三点坐标的线性组合形式,即 \((x,y)=\alpha A+\beta B+\gamma C\) 并且有\(\alpha + \beta +\gamma =1\)点\((\alpha ,\beta ,\gamma )\)就是这个点的重心坐标。关于重心坐标的求法,这里直接给出代码,不做推导:
//重心坐标的求解
static std::tuple<float, float, float> computeBarycentric2D(float x, float y, const Vector4f* v){
    float c1 = (x*(v[1].y() - v[2].y()) + (v[2].x() - v[1].x())*y + v[1].x()*v[2].y() - v[2].x()*v[1].y()) / (v[0].x()*(v[1].y() - v[2].y()) + (v[2].x() - v[1].x())*v[0].y() + v[1].x()*v[2].y() - v[2].x()*v[1].y());
    float c2 = (x*(v[2].y() - v[0].y()) + (v[0].x() - v[2].x())*y + v[2].x()*v[0].y() - v[0].x()*v[2].y()) / (v[1].x()*(v[2].y() - v[0].y()) + (v[0].x() - v[2].x())*v[1].y() + v[2].x()*v[0].y() - v[0].x()*v[2].y());
    float c3 = (x*(v[0].y() - v[1].y()) + (v[1].x() - v[0].x())*y + v[0].x()*v[1].y() - v[1].x()*v[0].y()) / (v[2].x()*(v[0].y() - v[1].y()) + (v[1].x() - v[0].x())*v[2].y() + v[0].x()*v[1].y() - v[1].x()*v[0].y());
    return {c1,c2,c3};
}
插值
有了重心公式,就可以对各个属性进行插值了,先写一个工具函数这里框架给出了,直接调用就好,来计算各种插值:
//三维向量版本,颜色、法线、view_pos
static Eigen::Vector3f interpolate(float alpha, float beta, float gamma, const Eigen::Vector3f& vert1, const Eigen::Vector3f& vert2, const Eigen::Vector3f& vert3, float weight)
{
    return (alpha * vert1 + beta * vert2 + gamma * vert3) / weight;
}
//二维向量版本,用于纹理坐标
static Eigen::Vector2f interpolate(float alpha, float beta, float gamma, const Eigen::Vector2f& vert1, const Eigen::Vector2f& vert2, const Eigen::Vector2f& vert3, float weight)
{
    auto u = (alpha * vert1[0] + beta * vert2[0] + gamma * vert3[0]);
    auto v = (alpha * vert1[1] + beta * vert2[1] + gamma * vert3[1]);
    u /= weight;
    v /= weight;
    return Eigen::Vector2f(u, v);
}
然后就是插值的实现了:
auto[alpha, beta, gamma] = computeBarycentric2D(i+0.5f, j+0.5f, t.v);
auto interpolated_color=interpolate(alpha,beta,gamma,t.color[0],t.color[1],t.color[2],1);
auto interpolated_normal=interpolate(alpha,beta,gamma,t.normal[0],t.normal[1],t.normal[2],1).normalized();
auto interpolated_shadingcoords=interpolate(alpha,beta,gamma,view_pos[0],view_pos[1],view_pos[2],1);
//二维版本
auto interpolated_texcoords=interpolate(alpha,beta,gamma,t.tex_coords[0],t.tex_coords[1],t.tex_coords[2],1);
最后调用fragment_shader计算最后的颜色值
payload.view_pos = interpolated_shadingcoords;
auto pixel_color = fragment_shader(payload);
// check zbuff
set_pixel(Eigen::Vector2i(i,j),pixel_color*IsInTriangleCount/4.0f);
get_projection_matrix()
前面提过了,这里只给出代码:
Eigen::Matrix4f get_projection_matrix(float eye_fov, float aspect_ratio, float zNear, float zFar)
{
    Eigen::Matrix4f projection = Eigen::Matrix4f::Identity();
    eye_fov=eye_fov/180*MY_PI;
    projection<<1/(aspect_ratio*tan(eye_fov/2.0f)) ,0,0,0,
                0,1/tan(eye_fov/2.0f),0,0,
                0,0,-(zFar+zNear)/(zFar-zNear),2*zFar*zNear/(zNear-zFar),
                0,0,-1,0;
    return projection;
}
运行 ./Rasterizer normal.png normal
output.png
phong_fragment_shader()
接下来需要实现的是Bline-Pong光照系统,首先来回忆一下Bline-Pong的操作步骤
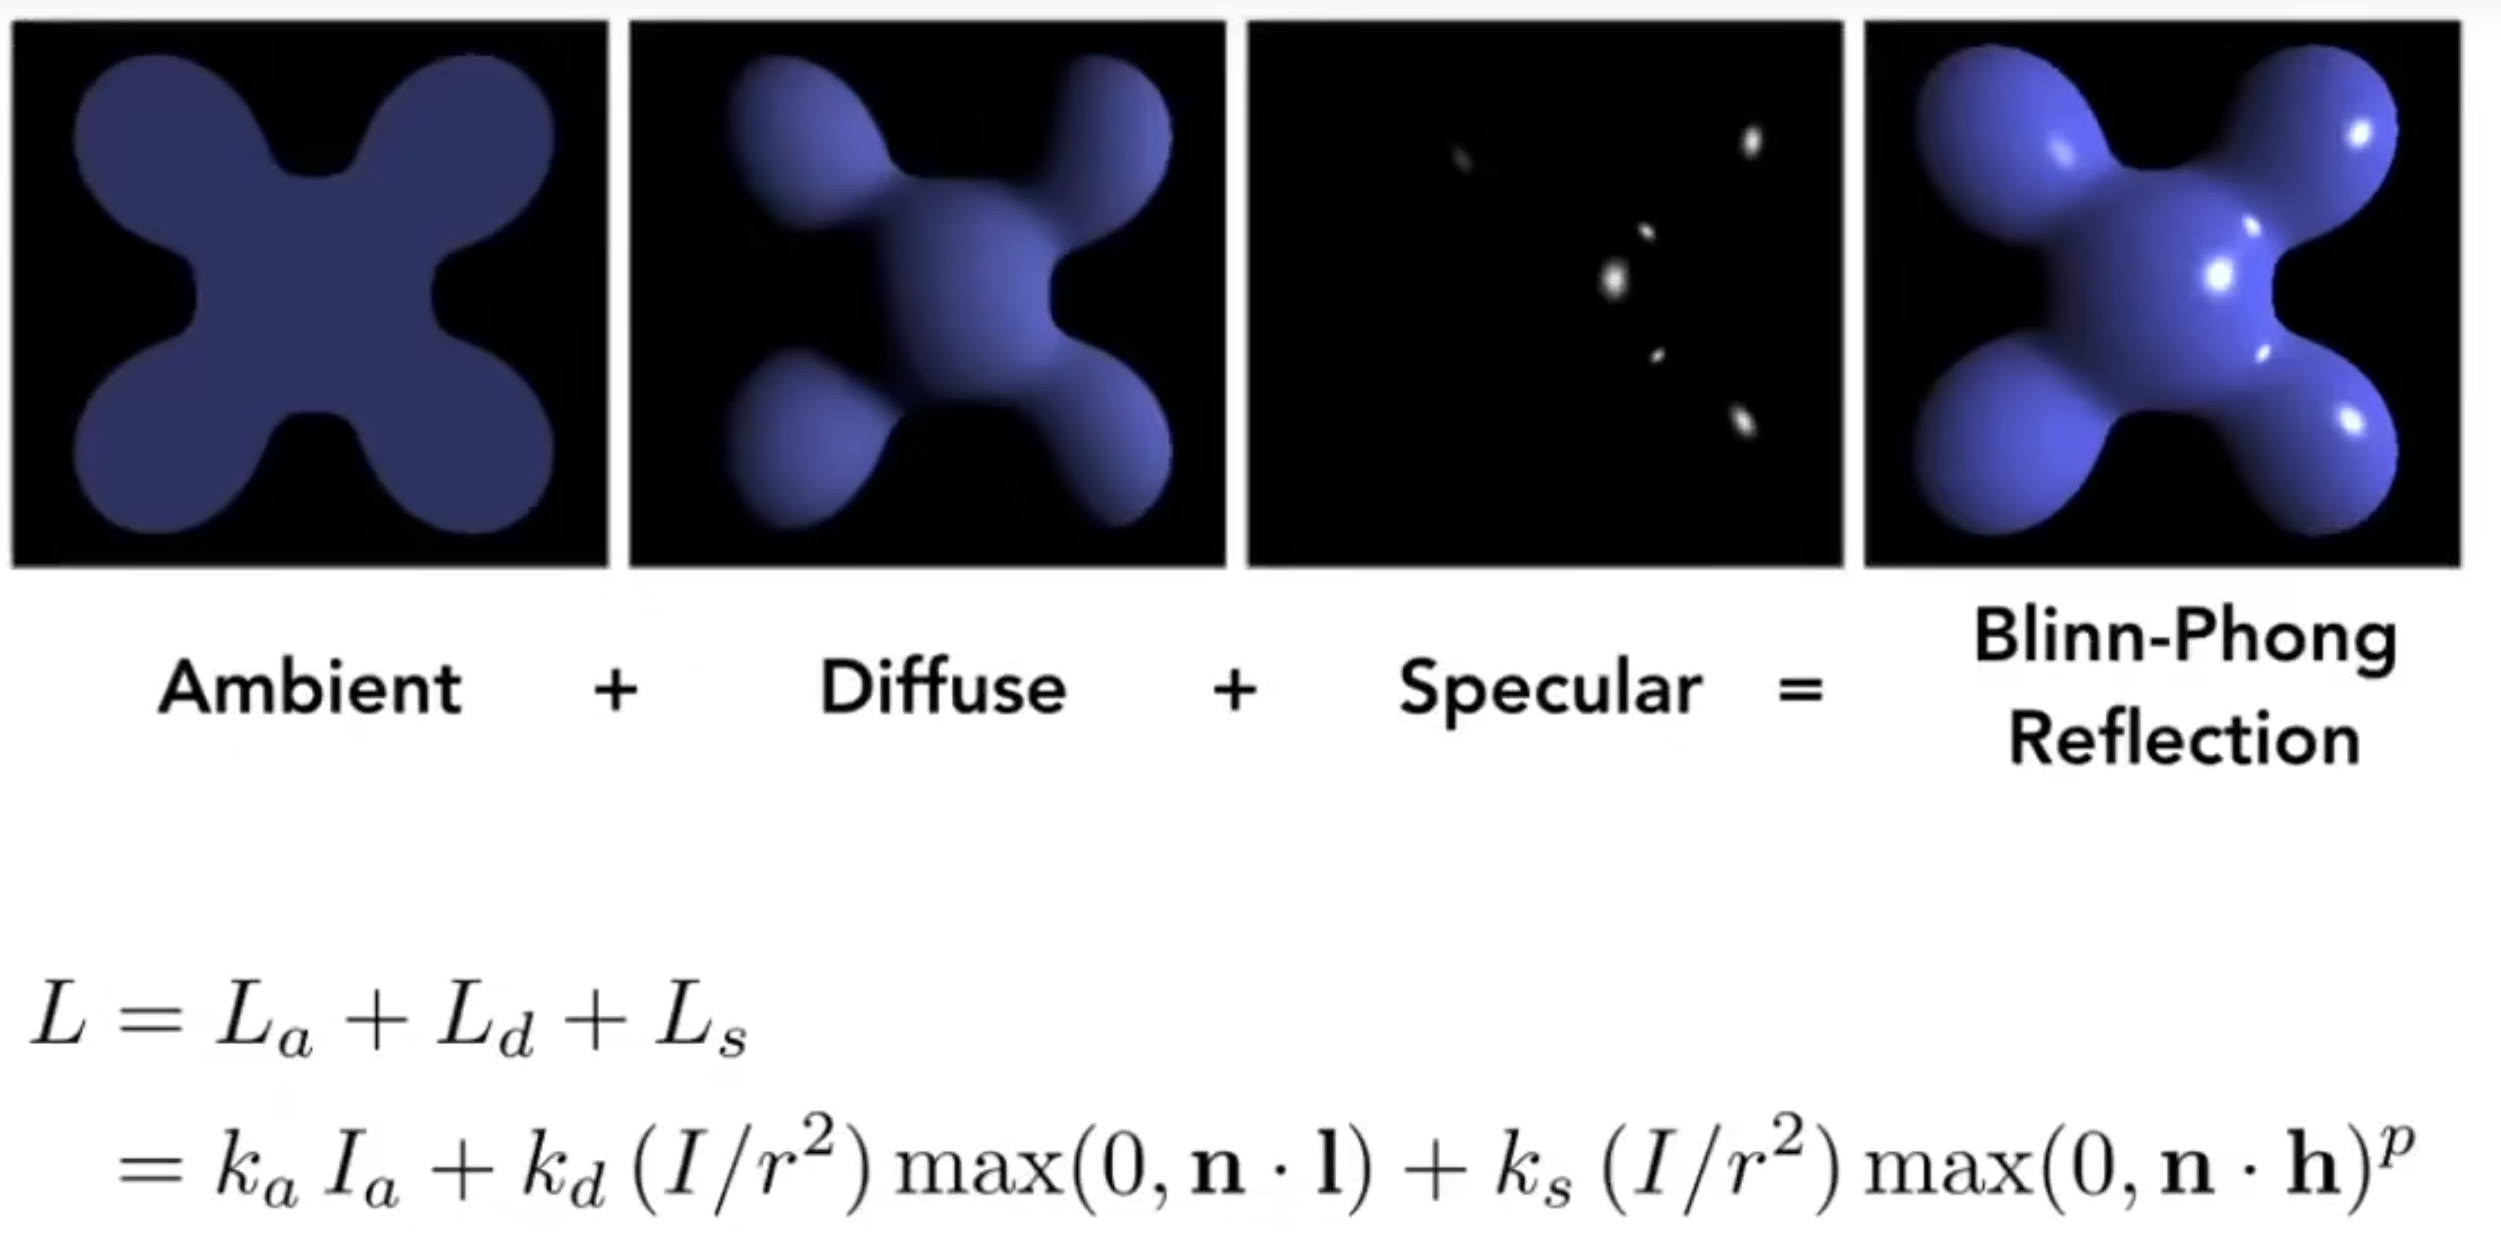
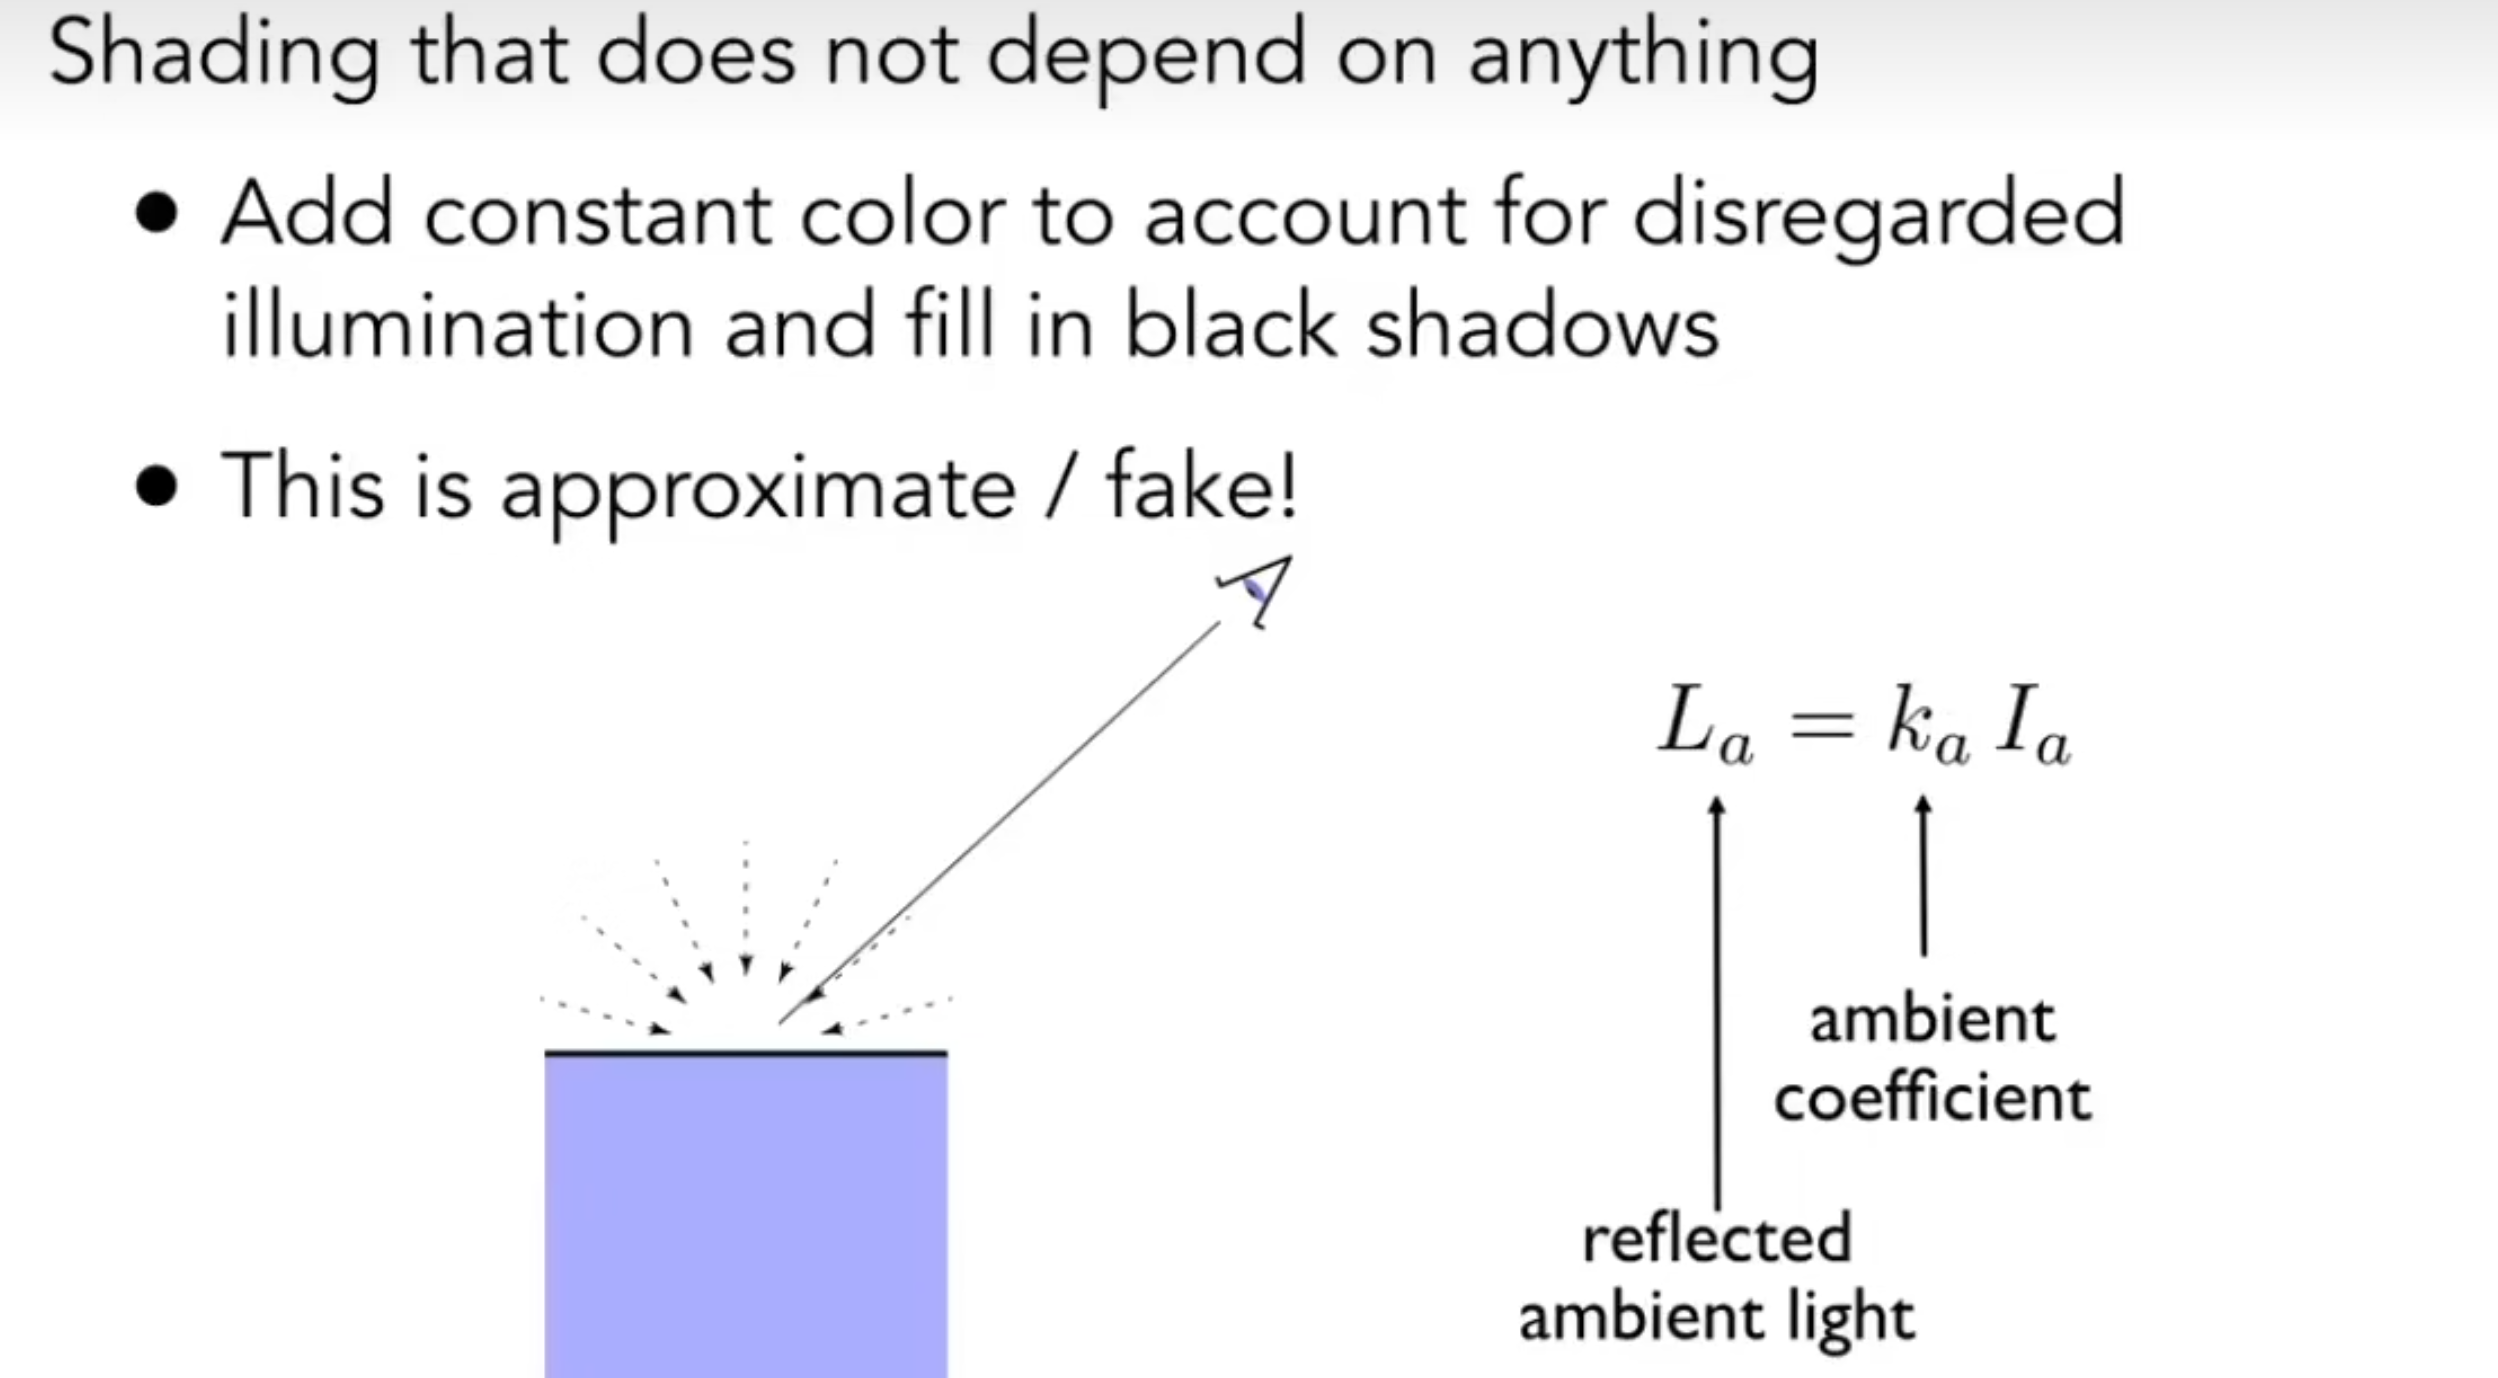
环境色Ambient
漫反射Diffuse
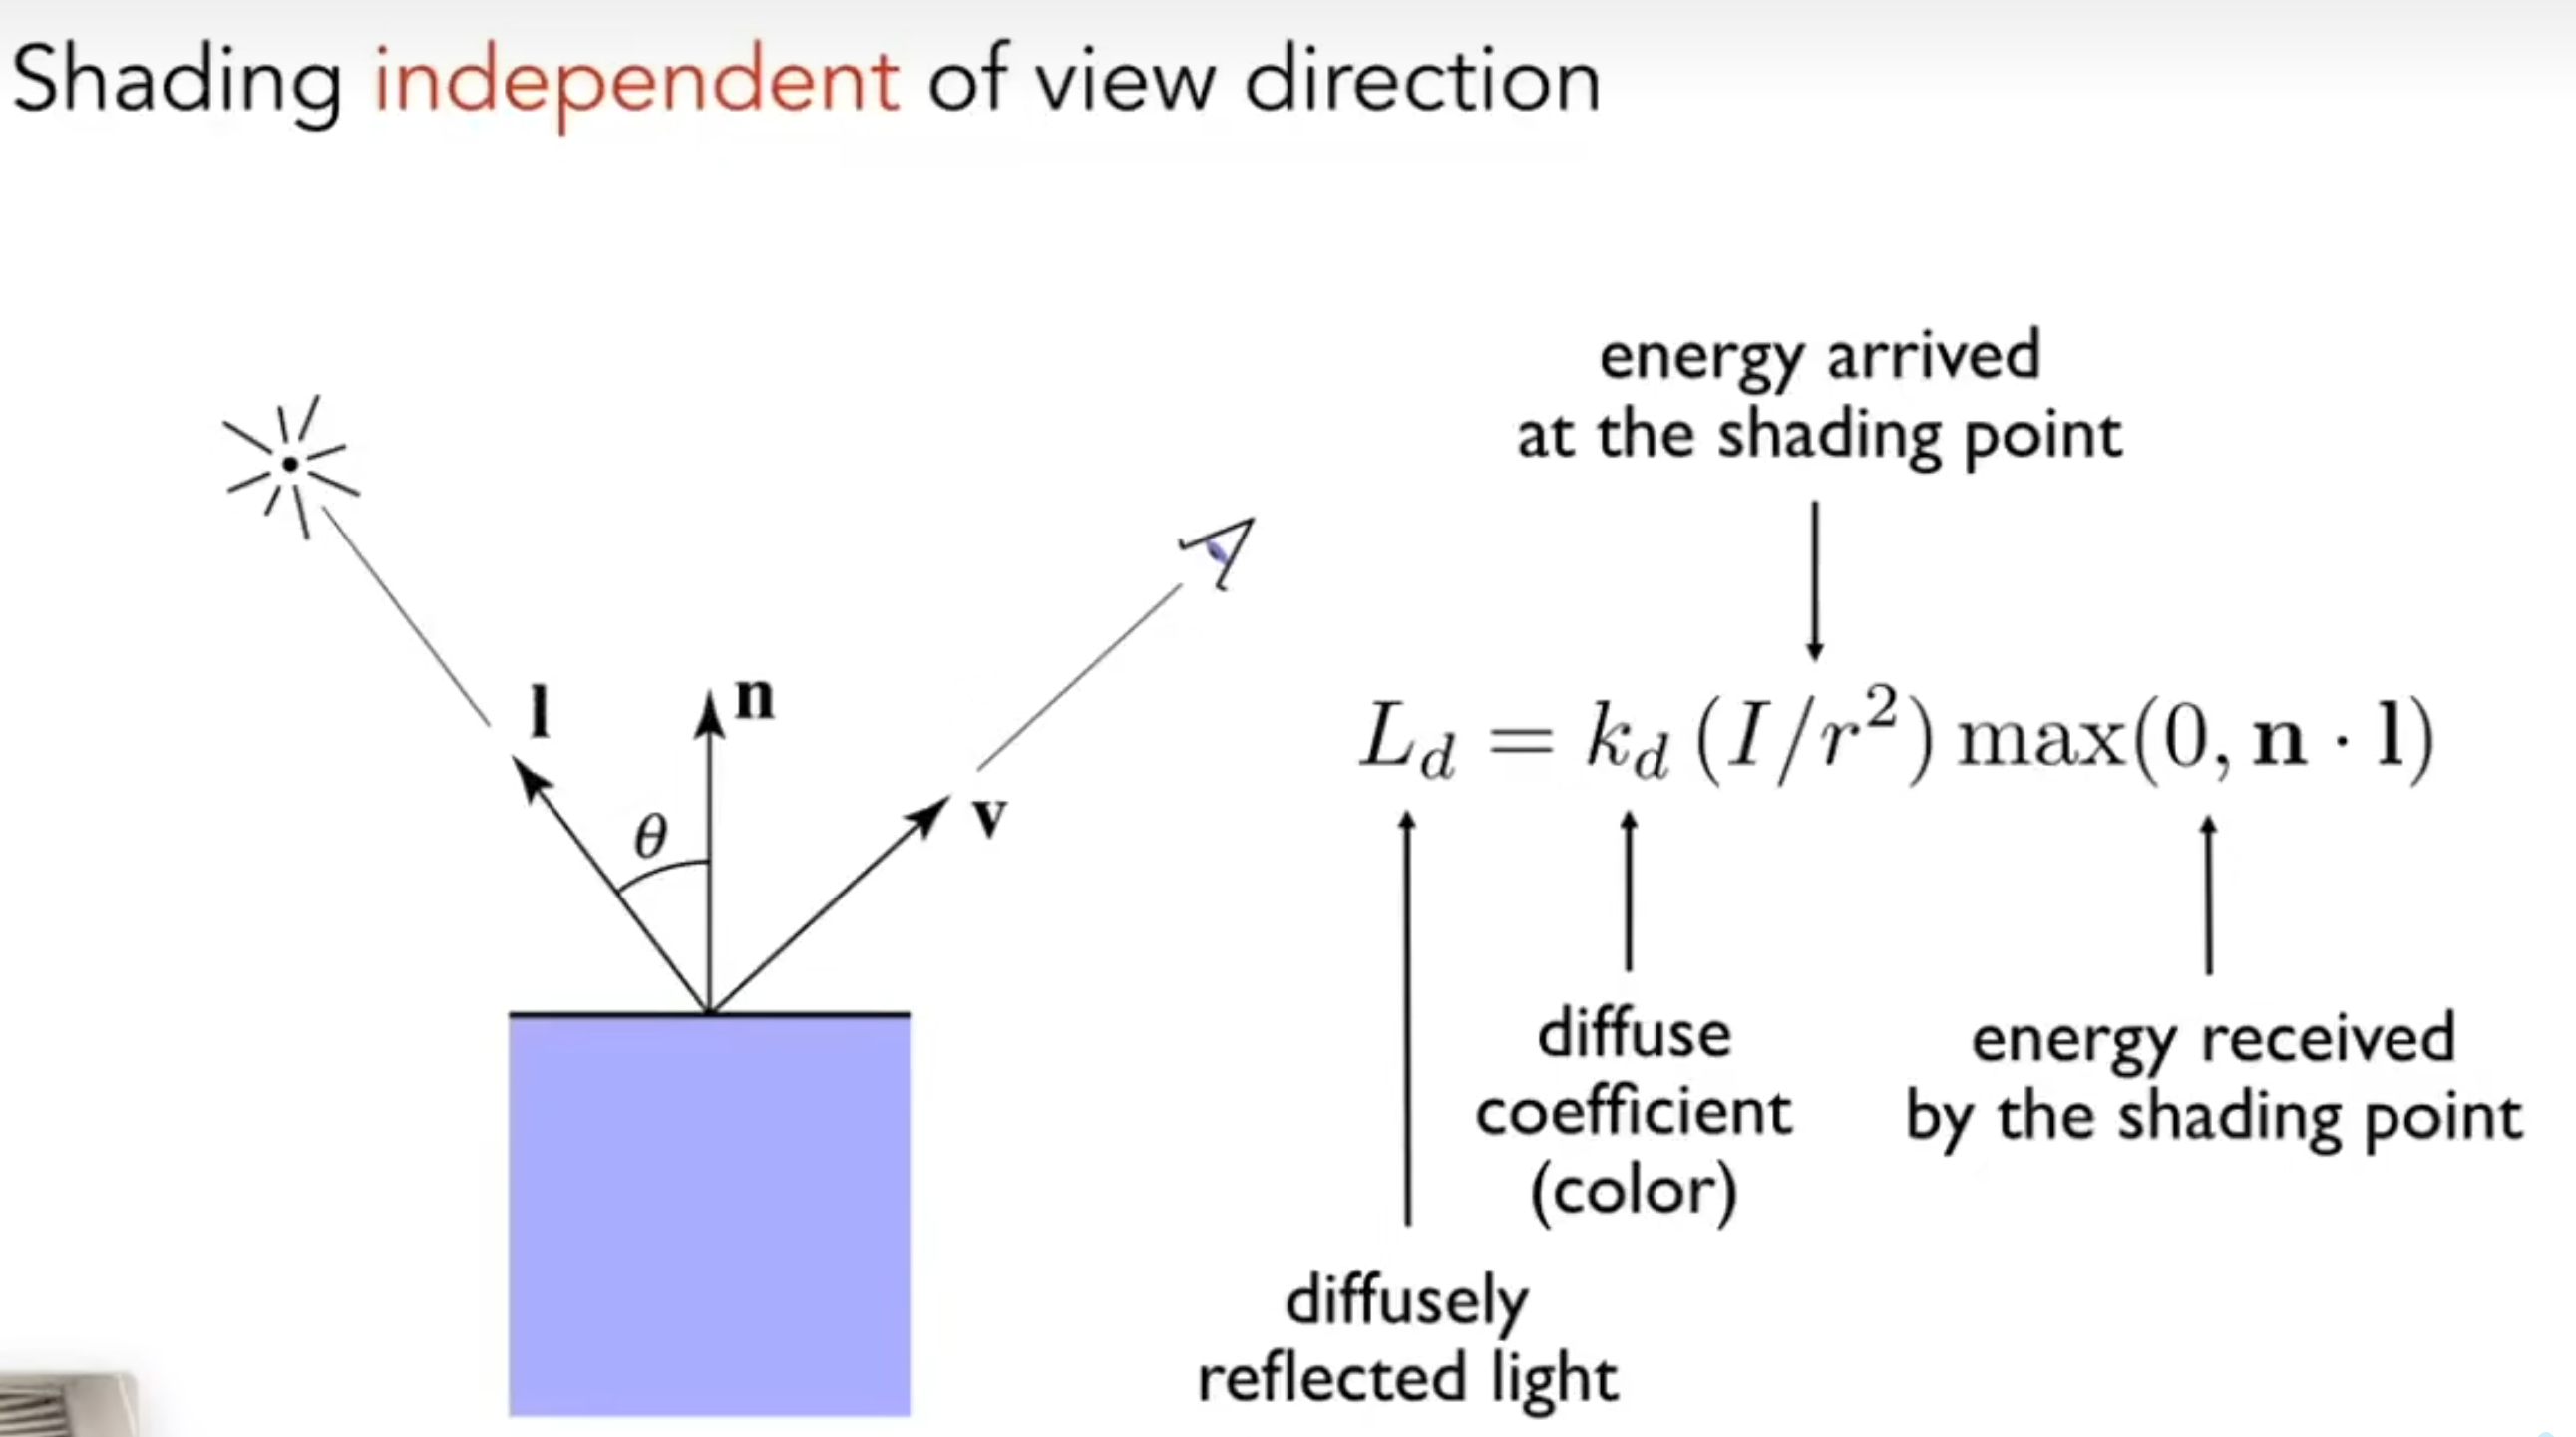
镜面反射Specular
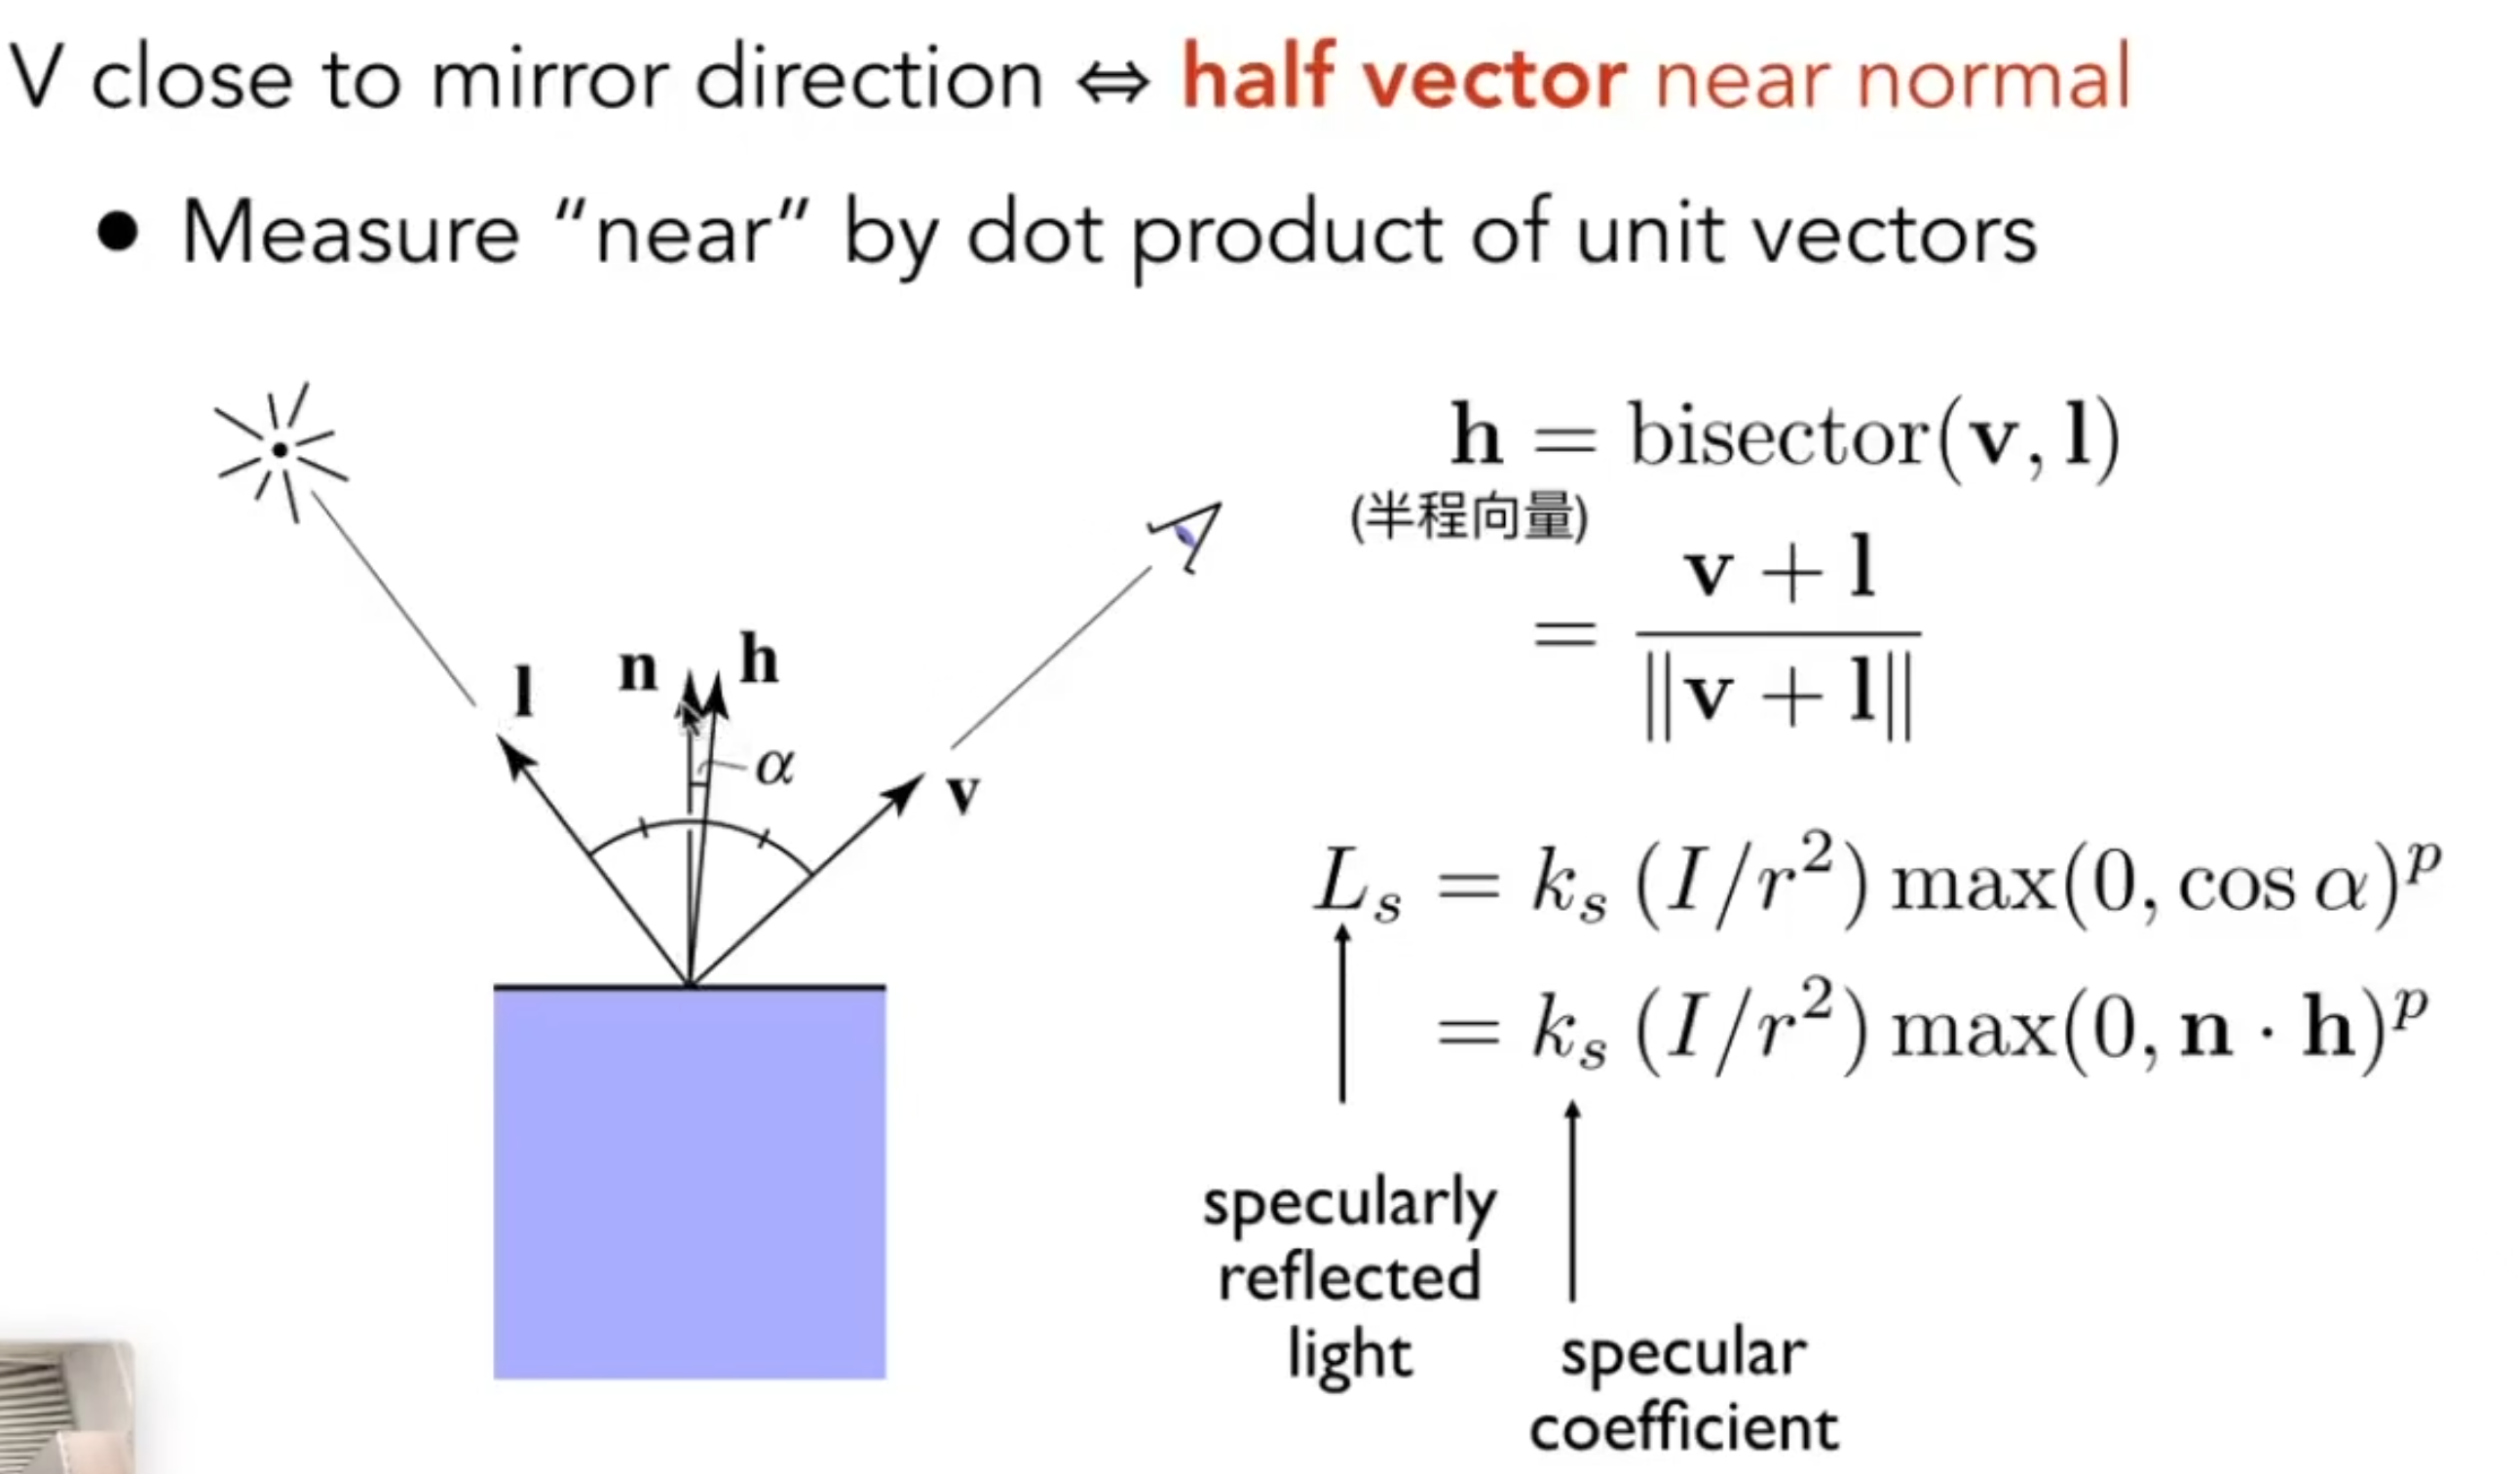
代码实现(看注释)
解释一下一些操作
- Eigen::Vector3f::cwiseProduct 返回两个矩阵(向量)同位置的元素分别相乘的新矩阵(向量)。
- std::pow(x,n)返回 \(x^n\)
//phong_fragment_shader

Eigen::Vector3f LightDir=light.position-point;
Eigen::Vector3f ViewDir=eye_pos-point;
//r ^ 2
float d=LightDir.dot(LightDir);
Eigen::Vector3f H=(LightDir.normalized()+ViewDir.normalized()).normalized();
//Ambient
Eigen::Vector3f Ambient= ka.cwiseProduct(amb_light_intensity);
float LdotN=(normal.normalized()).dot(LightDir.normalized());
float NdotH=(H.normalized()).dot(normal.normalized());
//Diffuse
Eigen::Vector3f Diffuse= std::max( LdotN , 0.0f)*kd.cwiseProduct(light.intensity/d);
//Specular
Eigen::Vector3f Specular= std::pow(std::max( NdotH , 0.0f),150)*ks.cwiseProduct(light.intensity/d);
result_color+=Ambient+Diffuse+Specular;
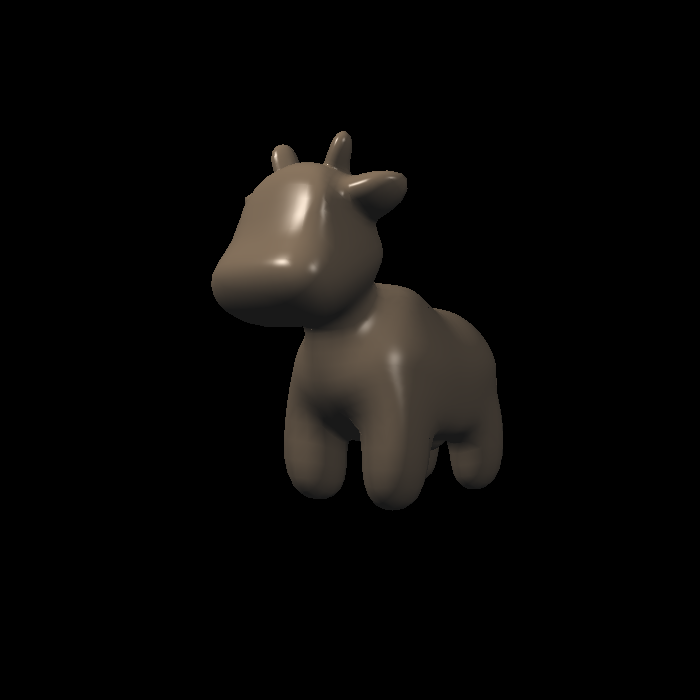
运行 ./Rasterizer phong.png phong
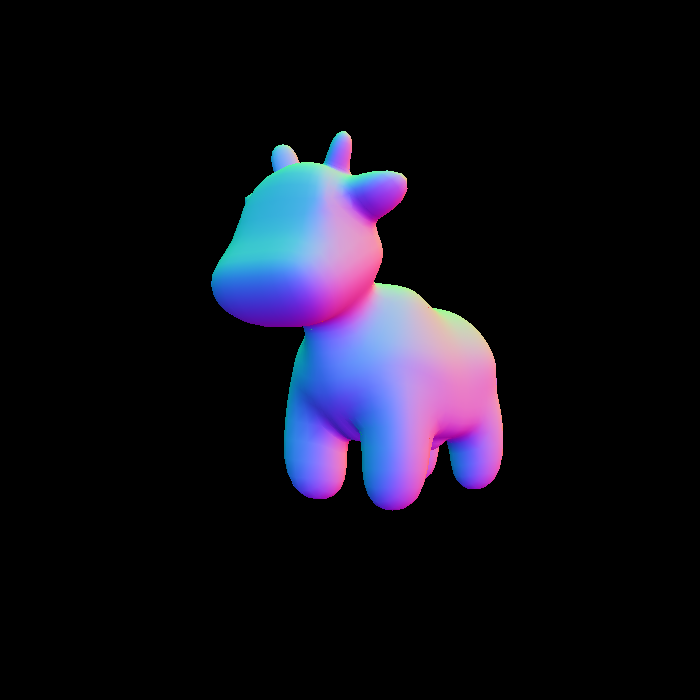
看看,我们的小牛又光滑了许多
texture_fragment_shader()
在基础任务中,纹理映射只需要在phong的基础上,把颜色换成纹理坐标对应的颜色就好了,在texture类中,框架已经实现了getColor函数,我们只需要在有纹理的时候调用getColor方法获取对应的颜色就好。
//texture_fragment_shader函数
    if (payload.texture)
    {
	 	return_color=payload.texture->getColor(payload.tex_coords.x(),payload.tex_coords.y());
    }
//getColor函数