Vite
Vue3
Vue Router4
Typescript
Pinia
Tailwind CSS
Fonts & Icons - (As needed)
第一步
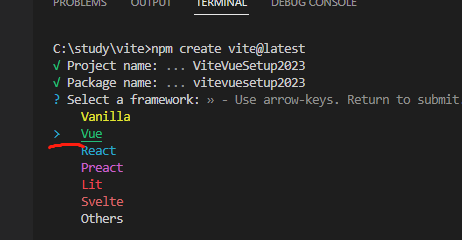
npm create vite@latest
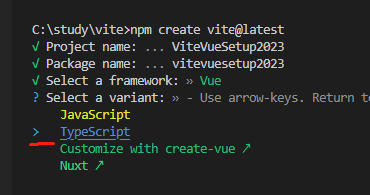
vue3 和 Typescript 在设置vite时候会被选择为选项
1.1 项目名字为viteVueSetup2023

选择Vue
选择TypeScript
执行这3个
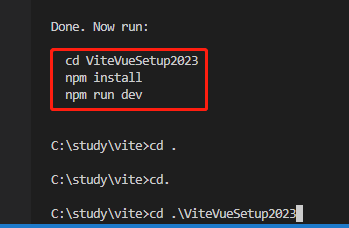
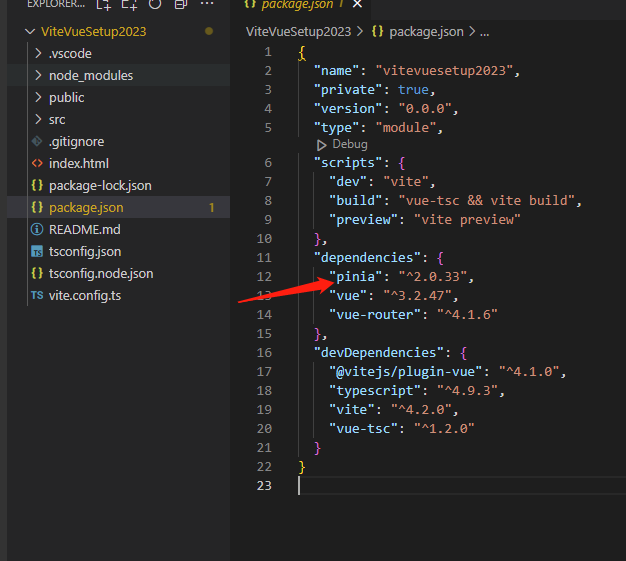
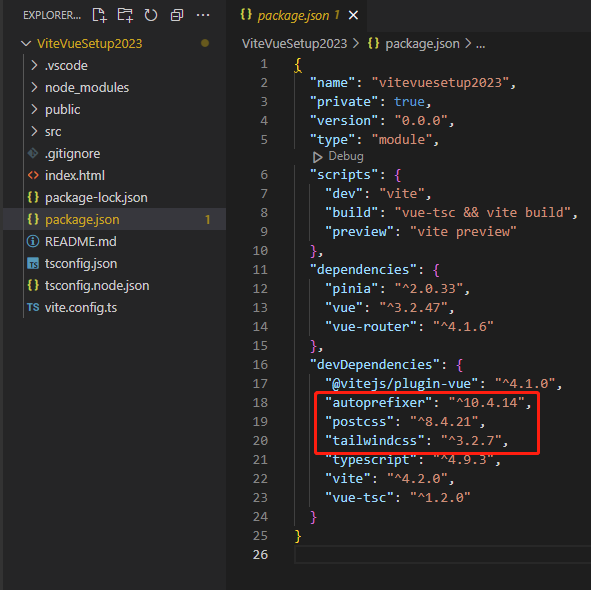
进入ViteVueSetup2023项目之后,我们看看包有什么

二. 安装Vue Router
npm install vue-router@4

三. 安装Pinia
npm install pinia
四. 安装Tailwind CSS
npm install -D tailwindcss postcss autoprefixer
-D:带有此标志的包将作为开发依赖项安装。这意味着,它们只在开发环境中使用,而不会在最终的生产应用程序包中发布
实用工具优先的CSS框架构建自定义Ul
五. 初始化包
- 安装所有节点包
- 初始化Tailwind CSS
- 设置PostCSS模块导出
- 安装TailwindCSS智能感知
- 设置漂亮的插件(如果需要)
- 设置Vite / Typescript别名(方便文件夹路径)(如果需要的话)
1.1 执行
npm install
1.2 再执行,生成一个tailwind.config.cjs文件
npx tailwindcss init

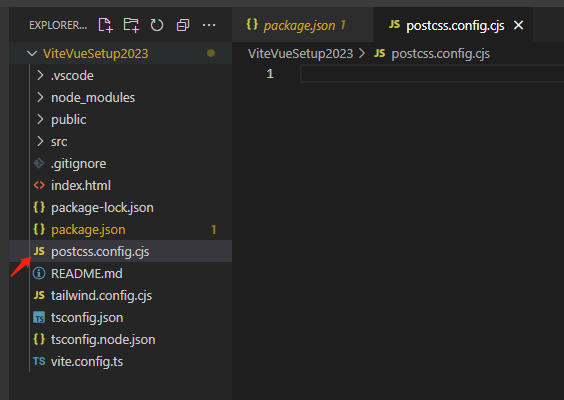
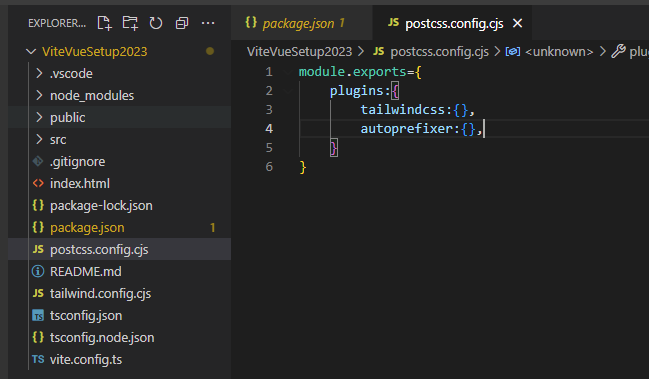
1.3 新建一个postcss.config.cjs文件
输入
module.exports={
    plugins:{
        tailwindcss:{},
        autoprefixer:{},
    }
}
1.4 安装插件 tailwind css

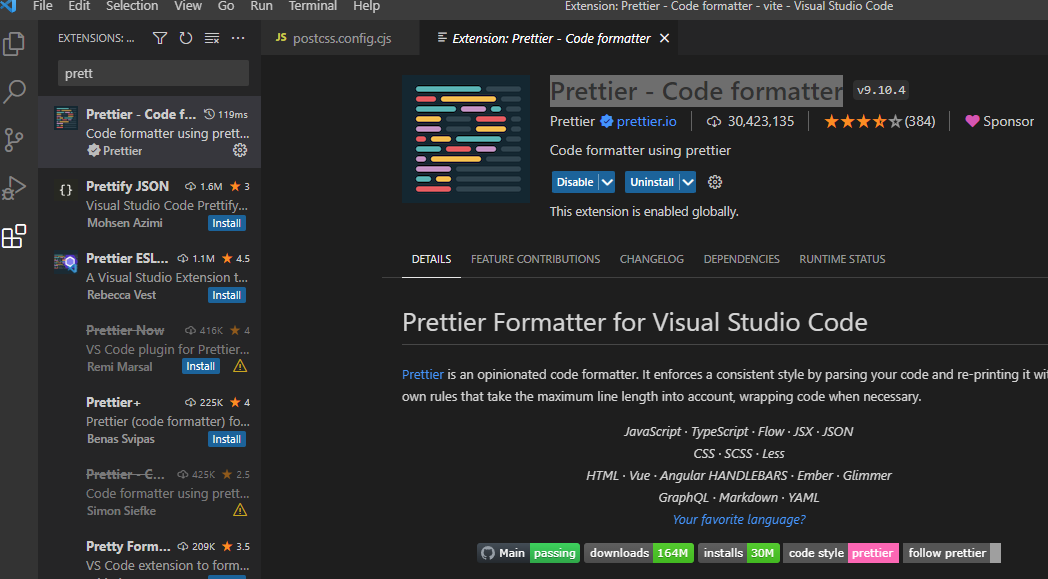
安装插件Prettier - Code formatter
1.5 npm 安装prettier
npm install -D prettier prettier-plugin-tailwindcss

1.6 新建一个.prettierrc.json
1.7 在tsconfig.json文件中添加baseUrl和paths
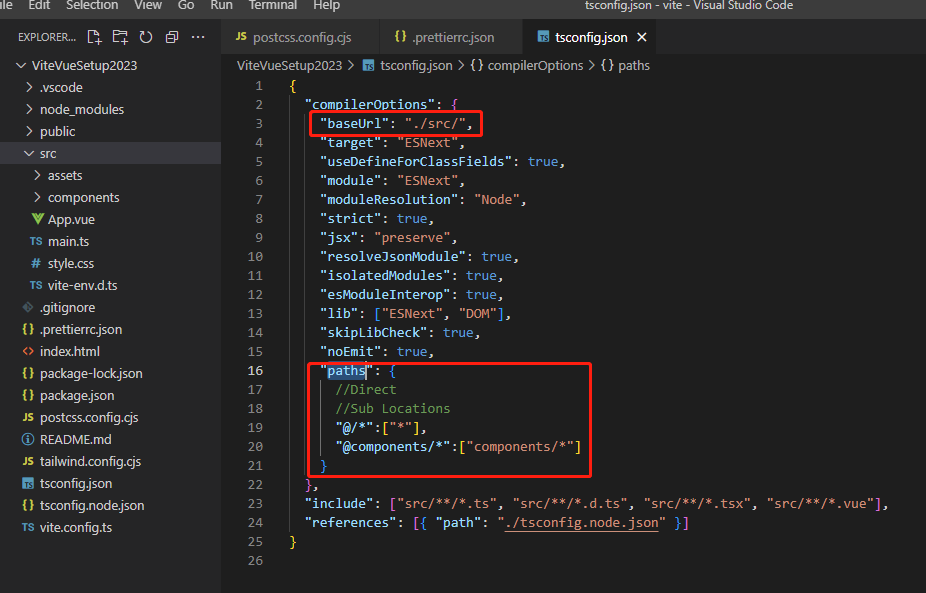
{
  "compilerOptions": {
    "baseUrl": "./src/",
    "target": "ESNext",
    "useDefineForClassFields": true,
    "module": "ESNext",
    "moduleResolution": "Node",
    "strict": true,
    "jsx": "preserve",
    "resolveJsonModule": true,
    "isolatedModules": true,
    "esModuleInterop": true,
    "lib": ["ESNext", "DOM"],
    "skipLibCheck": true,
    "noEmit": true,
    "paths": {
      //Direct
      //Sub Locations
      "@/*":["*"],
      "@components/*":["components/*"]
    }
  },
  "include": ["src/**/*.ts", "src/**/*.d.ts", "src/**/*.tsx", "src/**/*.vue"],
  "references": [{ "path": "./tsconfig.node.json" }]
}
1.8 设置vite.config.ts 文件
先执行
npm install -D @types/node
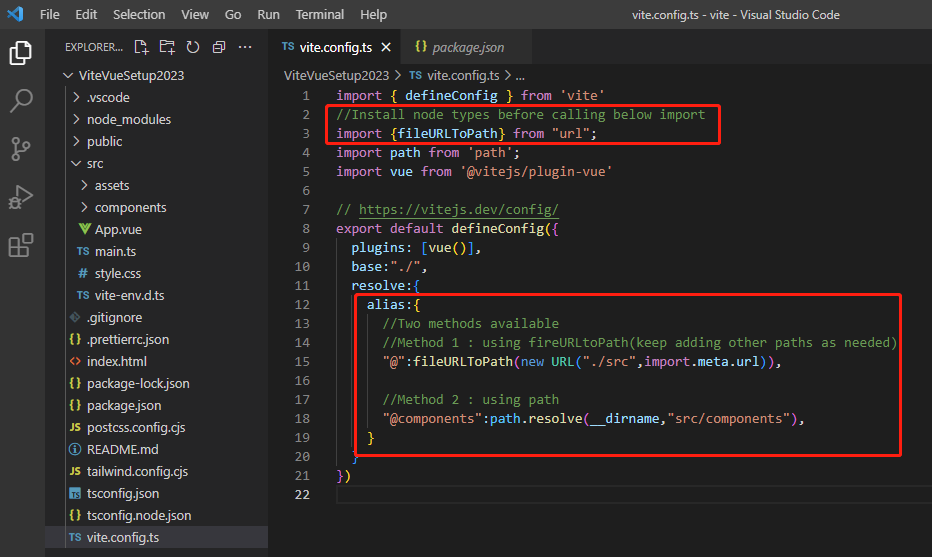
import { defineConfig } from 'vite'
//Install node types before calling below import
import {fileURLToPath} from "url";
import path from 'path';
import vue from '@vitejs/plugin-vue'

// https://vitejs.dev/config/
export default defineConfig({
  plugins: [vue()],
  base:"./",
  resolve:{
    alias:{
      //Two methods available
      //Method 1 : using fireURLtoPath(keep adding other paths as needed)
      "@":fileURLToPath(new URL("./src",import.meta.url)),

      //Method 2 : using path
      "@components":path.resolve(__dirname,"src/components"),
    }
  }
})
1.9 执行 npm run dev

六 . 配置使用tailwind
1.1 原因
在这一点上,我们只是安装tailwind。
步骤1:必须指示加载文件格式(应该访问顺风的地方)
步骤2:CSS应该包括tailwindimports。
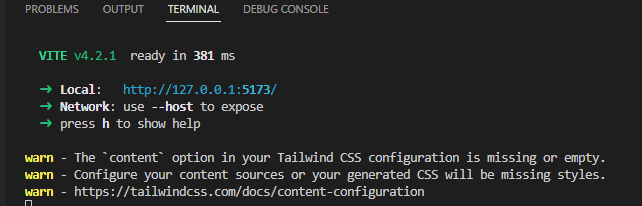
我们运行 npm run dev的时候发生警告
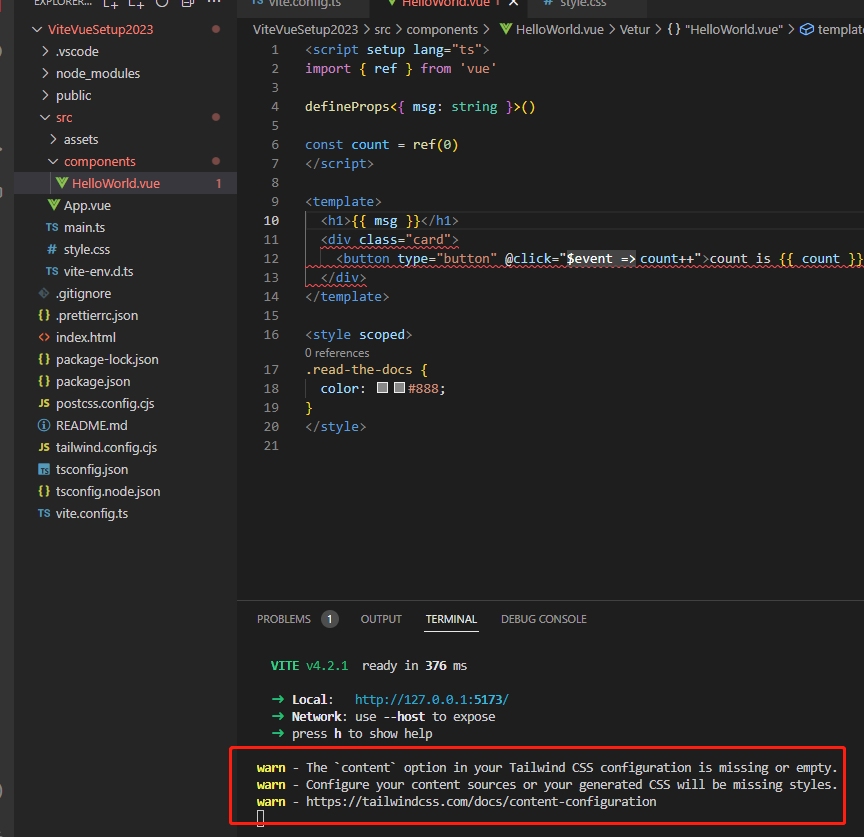
警告 - Tailwind CSS 配置中的“内容”选项缺失或为空。
警告 - 配置内容源,否则生成的 CSS 将缺少样式。
警告 - https://tailwindcss.com/docs/content-configuration
1.2 打开 tailwind.config.cjs文件
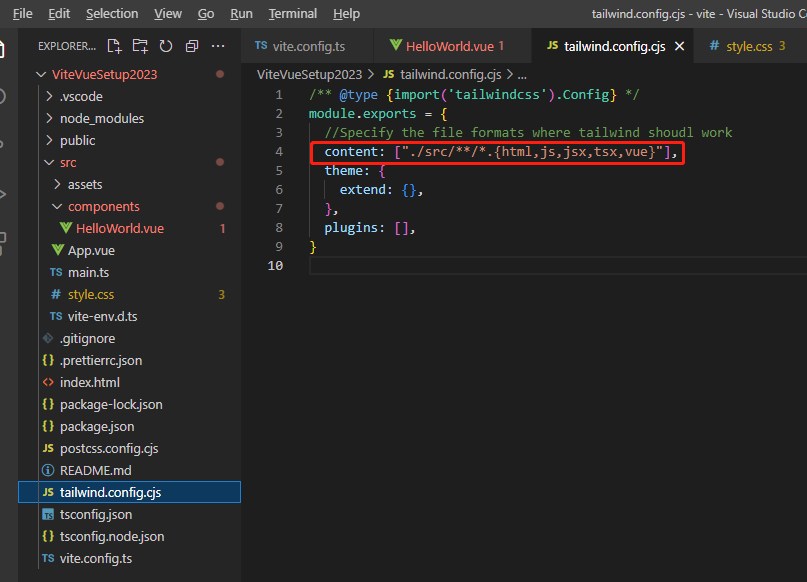
/** @type {import('tailwindcss').Config} */
module.exports = {
  //Specify the file formats where tailwind shoudl work
  content: ["./src/**/*.{html,js,jsx,tsx,vue}"],
  theme: {
    extend: {},
  },
  plugins: [],
}
打开 style.css

@tailwind base;
@tailwind components;
@tailwind utilities;

:root {
  font-family: Inter, system-ui, Avenir, Helvetica, Arial, sans-serif;
  line-height: 1.5;
  font-weight: 400;
}
1.3 在tsconfig中包含vite配置
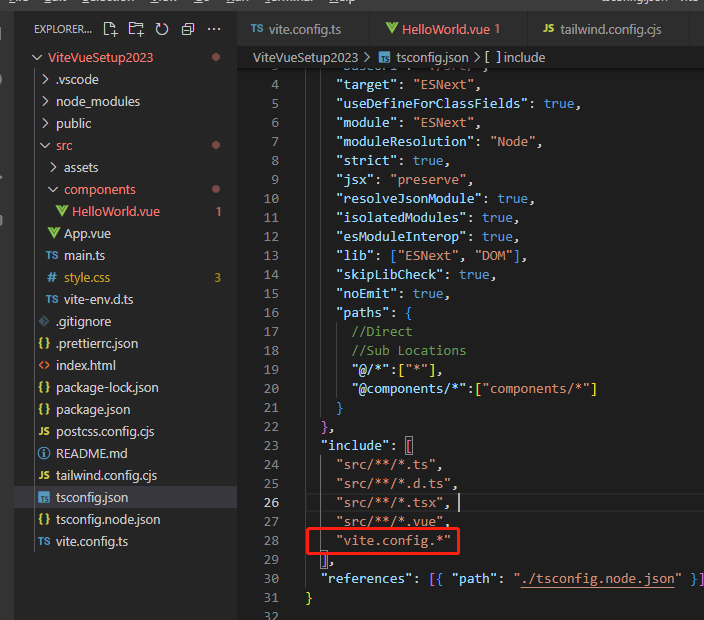
{
  "compilerOptions": {
    "baseUrl": "./src/",
    "target": "ESNext",
    "useDefineForClassFields": true,
    "module": "ESNext",
    "moduleResolution": "Node",
    "strict": true,
    "jsx": "preserve",
    "resolveJsonModule": true,
    "isolatedModules": true,
    "esModuleInterop": true,
    "lib": ["ESNext", "DOM"],
    "skipLibCheck": true,
    "noEmit": true,
    "paths": {
      //Direct
      //Sub Locations
      "@/*":["*"],
      "@components/*":["components/*"]
    }
  },
  "include": [
    "src/**/*.ts",
    "src/**/*.d.ts",
    "src/**/*.tsx",
    "src/**/*.vue",
    "vite.config.*"
  ],
  "references": [{ "path": "./tsconfig.node.json" }]
}
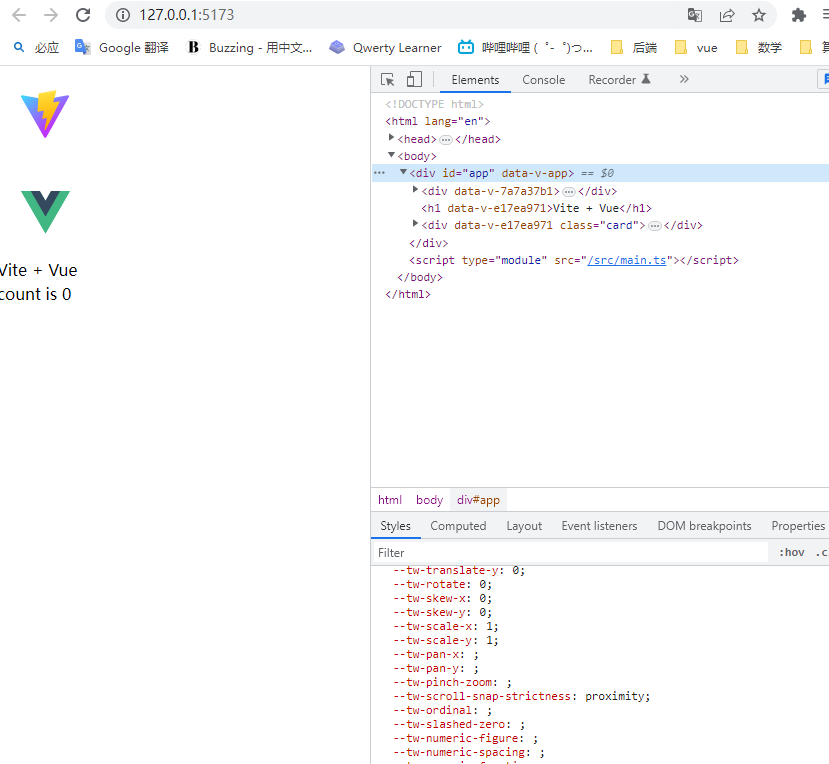
我们已经准备好开始在vue 3中使用tailwind和typescript
七,使用 tailwind
1.1 添加类
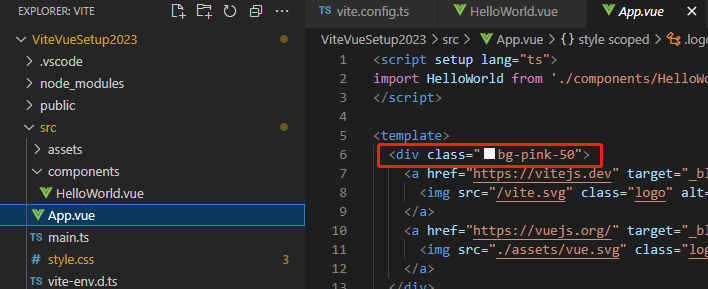

1.2 在style.css文件使用

@tailwind base;
@tailwind components;
@tailwind utilities;

:root {
  font-family: Inter, system-ui, Avenir, Helvetica, Arial, sans-serif;
  line-height: 1.5;
  font-weight: 400;
}

body{
  @apply bg-green-100 p-5 m-0 w-full h-screen;
}
import 可以修改

改成
import HelloWorld from '@components/HelloWorld.vue'
WORKS Typescript
WORKS Tailwind ----------------完
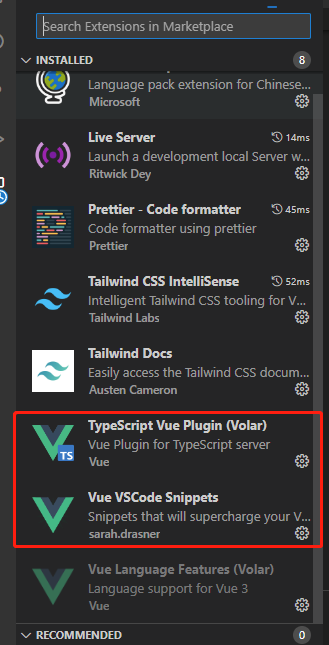
TypeScript Vue Plugin (Volar)
Vue VSCode Snippets
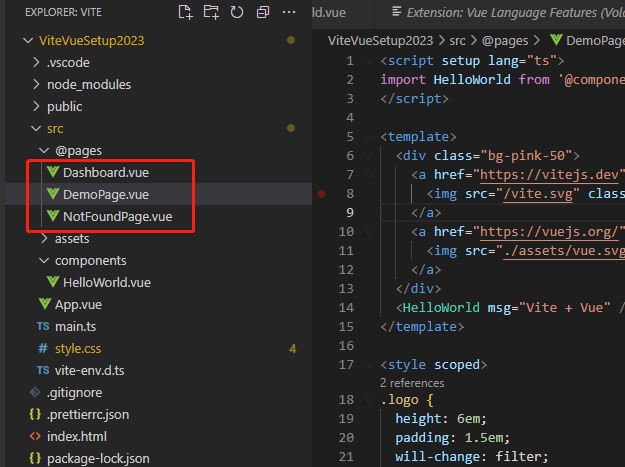
Dashboard.vue
<template>
    <div>
This is dashboard
    </div>
</template>

<script setup lang="ts">

</script>

<style scoped>

</style>
NotFoundPage.vue
<template>
    <div>
Page not found
    </div>
</template>

<script setup lang="ts">

</script>

<style scoped>

</style>
DemoPage.vue
<script setup lang="ts">
import HelloWorld from '@components/HelloWorld.vue'
</script>

<template>
  <div class="bg-pink-50">
    <a href="https://vitejs.dev" target="_blank">
      <img src="/vite.svg" class="logo" alt="Vite logo" />
    </a>
    <a href="https://vuejs.org/" target="_blank">
      <img src="./assets/vue.svg" class="logo vue" alt="Vue logo" />
    </a>
  </div>
  <HelloWorld msg="Vite + Vue" />
</template>

<style scoped>
.logo {
  height: 6em;
  padding: 1.5em;
  will-change: filter;
  transition: filter 300ms;
}
.logo:hover {
  filter: drop-shadow(0 0 2em #646cffaa);
}
.logo.vue:hover {
  filter: drop-shadow(0 0 2em #42b883aa);
}
</style>
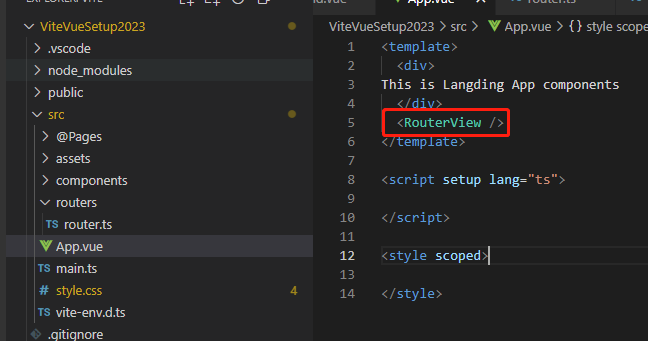
App.vue换成
<template>
  <div>
This is Langding App components
  </div>
</template>

<script setup lang="ts">

</script>

<style scoped>

</style>
1.3 在src下面新建一个文件夹 routes, 再建一个router.ts文件

vite.config.ts 文件添加 "@pages":path.resolve(__dirname,"src/@Pages"),

tsconfig.json 添加 "@pages/*":["@Pages/*"],

routers文件夹下的 reouter.ts
import * as vR from 'vue-router';
import DashboardVue from '@pages/Dashboard.vue';
import Pnf from "@pages/NotFoundPage.vue"


//Create a router and then export it

const _routes:Array<vR.RouteRecordRaw> = [
    //Path  6 Component are mandatory
    {
        path:"/",
        component:DashboardVue,
        name:"home"
    },
    {
        path:"/demo",
        component:()=>import("@pages/DemoPage.vue"),//Lazy Loading to defer loading only when required
        name:"home.demo"  //Use defined kepp dot notation to have  elegant design
    },
    {
        path:"/nf", //need to change with regex to catch all non-defined
        component:Pnf,
        name:"home.missing"
    },
];


const router = vR.createRouter({
    history:vR.createMemoryHistory(),//webHash history will  add hash before every route
    routes:_routes, //Send the routes here.
})


export default router;
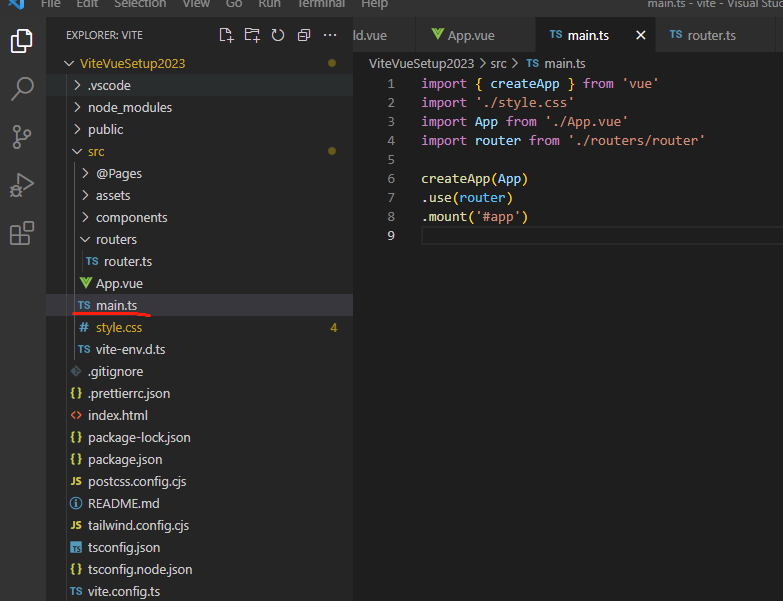
import { createApp } from 'vue'
import './style.css'
import App from './App.vue'
import router from './routers/router'

createApp(App)
.use(router)
.mount('#app')
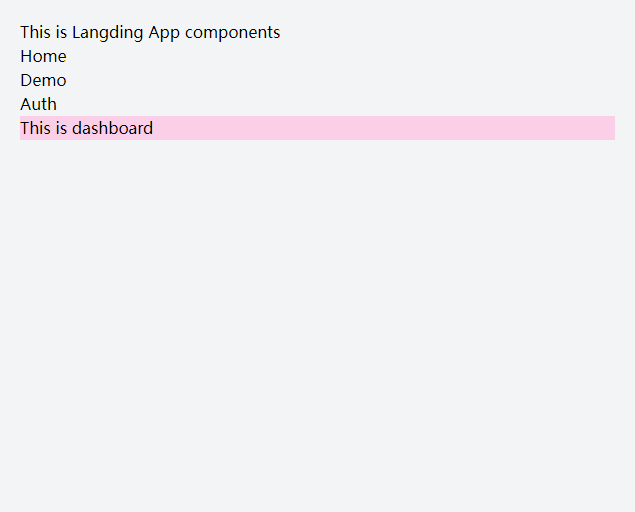
<template>
  <div >
This is Langding App components
    <ul>
      <RouterLink to="/" >
        <li>Home</li>
      </RouterLink>
      <RouterLink to="/demo" >
        <li>Demo</li>
      </RouterLink>
      <RouterLink to="/auth" >
        <li>Auth</li>
      </RouterLink>
    </ul>
  </div>
  <RouterView />
</template>

<script setup lang="ts">

</script>

<style scoped>

</style>
在@Pages文件夹添加多一个文件,AuthPage.vue
<template>
    <div>
        Authorize me
    </div>
</template>

<script setup lang="ts">

</script>

<style scoped>

</style>
router.ts文件
{
        path:"/auth",
        component:()=>import("@pages/AuthPage.vue"),//Lazy Loading to defer loading only when required
        name:"home.auth"  //Use defined kepp dot notation to have  elegant design
    },
最后切换
Router ----------WORKS 完
Pinia---- start
37 分